最近我搭建了一个全新的家庭实验环境,选择了业界领先的开源虚拟化平台 Proxmox Virtual Environment (PVE) 作为核心:
1 https://www.proxmox.com/en/proxmox-virtual-environment/overview
Proxmox VE 是一个企业级的开源解决方案,它完美集成了KVM虚拟机和LXC容器技术,提供了强大而灵活的虚拟化管理能力。部署过程相当直观,只需准备一个USB启动盘,按照标准的引导安装流程即可完成基础环境搭建。
我经常为自己工作环境问题而感到非常痛苦,我想尝试利用PVE将我从诸类痛苦中解脱释放出来。
基础配置优化 Proxmox基于Debian发行版的,碍于它定位是一台小服务器,所以并不打算给它翻墙,用国内源即可:
1 2 3 4 5 6 7 8 9 10 11 12 13 deb https://mirrors.tuna.tsinghua.edu.cn/debian/ bookworm main contrib non-free non-free-firmware deb-src https://mirrors.tuna.tsinghua.edu.cn/debian/ bookworm main contrib non-free non-free-firmware deb https://mirrors.tuna.tsinghua.edu.cn/debian/ bookworm-updates main contrib non-free non-free-firmware deb-src https://mirrors.tuna.tsinghua.edu.cn/debian/ bookworm-updates main contrib non-free non-free-firmware deb https://mirrors.tuna.tsinghua.edu.cn/debian/ bookworm-backports main contrib non-free non-free-firmware deb-src https://mirrors.tuna.tsinghua.edu.cn/debian/ bookworm-backports main contrib non-free non-free-firmware deb https://mirrors.tuna.tsinghua.edu.cn/debian-security bookworm-security main contrib non-free non-free-firmware deb-src https://mirrors.tuna.tsinghua.edu.cn/debian-security bookworm-security main contrib non-free non-free-firmware
安装完默认会有一个**/etc/apt/sources.list.d/pve-enterprise.list**文件,其中包含着国外的企业版仓库源,很慢,可以将其注释。更换国内清华的:
1 deb https://mirrors.tuna.tsinghua.edu.cn/proxmox/debian/pve bookworm pve-no-subscription
还有个ceph源默认也是走的官方非常慢,也可以走清华源:
1 curl -fsSL 'https://mirrors.tuna.tsinghua.edu.cn/ceph/keys/release.asc' | gpg --dearmor -o /etc/apt/keyrings/ceph.gpg
1 echo "deb [signed-by=/etc/apt/keyrings/ceph.gpg] https://mirrors.tuna.tsinghua.edu.cn/ceph/debian-octopus/ buster main" > /etc/apt/sources.list.d/ceph.list
还要个CT模板源,LXC 容器的模板国内也有源:
1 cp /usr/share/perl5/PVE/APLInfo.pm /usr/share/perl5/PVE/APLInfo.pm_back
1 sed -i 's|http://download.proxmox.com|https://mirrors.tuna.tsinghua.edu.cn/proxmox|g' /usr/share/perl5/PVE/APLInfo.pm
重启服务生效:
1 systemctl restart pvedaemon.service
配置好后访问默认
1 https://your_ip_address:8006
输入安装时候设置的root用户账户密码即可:
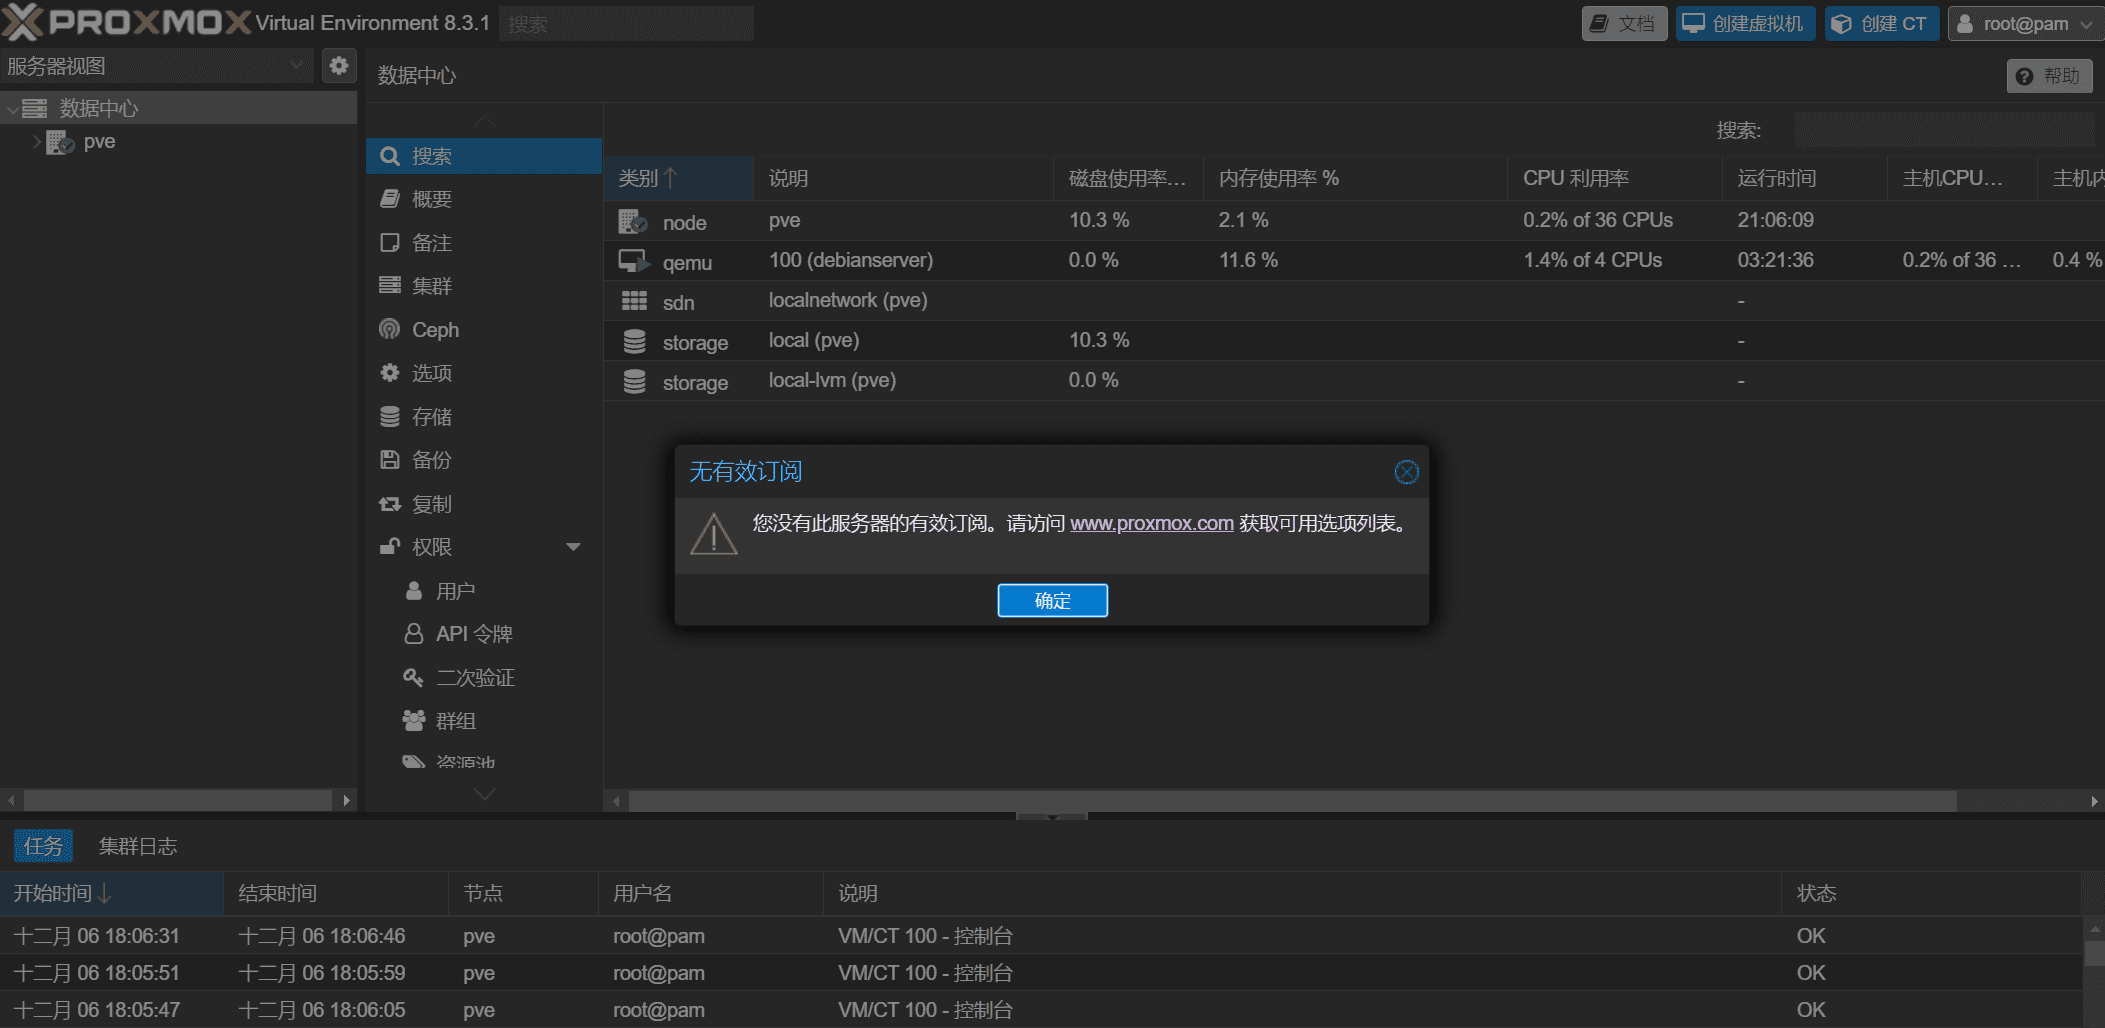
登录会有一个烦人的弹窗:
代码在以下位置:
1 cd /usr/share/javascript/proxmox-widget-toolkit/
记得先备份:
1 cp proxmoxlib.js proxmoxlib.js.bak
然后搜索:
1 cat proxmoxlib.js | grep "checked_command" -n
我的在554行,变更前是这样:
1
2
3
4
5
6
7
checked_command: function (orig_cmd) { Proxmox.Utils.API2Request( { url: '/nodes/localhost/subscription' , method: 'GET' , failure: function (response, opts) {
变更后是这样:
1
2
3
4
5
6
7
8
9
checked_command: function (orig_cmd) { orig_cmd(); return ; Proxmox.Utils.API2Request( { url: '/nodes/localhost/subscription' , method: 'GET' , failure: function (response, opts) {
然后重启服务:
1 systemctl restart pveproxy.service
我一直是觉得浏览器输IP地址加端口是非常不雅的行为,所以我准备将其证书换成我自己的SSL证书,证书路径在以下位置:
1 /etc/pve/nodes/(node_name)
在 PVE 集群环境中,node_name 代表节点标识符,它默认继承自系统主机名(hostname),我的主机名就叫PVE,所以节点名称也是PVE,但是为了自己的规范,我将名称改了,改为了proxmox。改个名还比较麻烦:
1
2
3
vim /etc/hostname vim /etc/hosts hostnamectl set-hostname proxmox
然后重启,就发现节点名称改了。接下来是替换证书,首先将证书转换为pem格式:
1 openssl x509 -in certificate.crt -out certificate.pem -outform PEM
然后对目录中的证书进行替换,比如我的主机名是proxmox:
那我的证书就是替换:
1
2
cp ~/private.key pve-ssl.keycp ~/certificate.pem pve-ssl.pem
然后重启服务:
1 systemctl restart pveproxy
试了下使用iptables进行转发,但是效果不好,但是PVE系统又要尽量的保持精简,目前想了一个方案,就是装一台虚拟机,然后在虚拟机中装一个nginx用来进行反代。稍后再说。
基础使用流程
管理面板还是比骄一目了然,目前安装成功后数据中心中可以看到自己节点下有三个:
1
2
3
localnetwork 本地网络,主要用于虚拟机和容器之间的内部网络通信 local 本地存储,自动安装时默认分了100GB大小,通常用来存储上传后的镜像local-lvm 本地存储,通常用来存放虚拟机文件
上传镜像就是按下图所示:
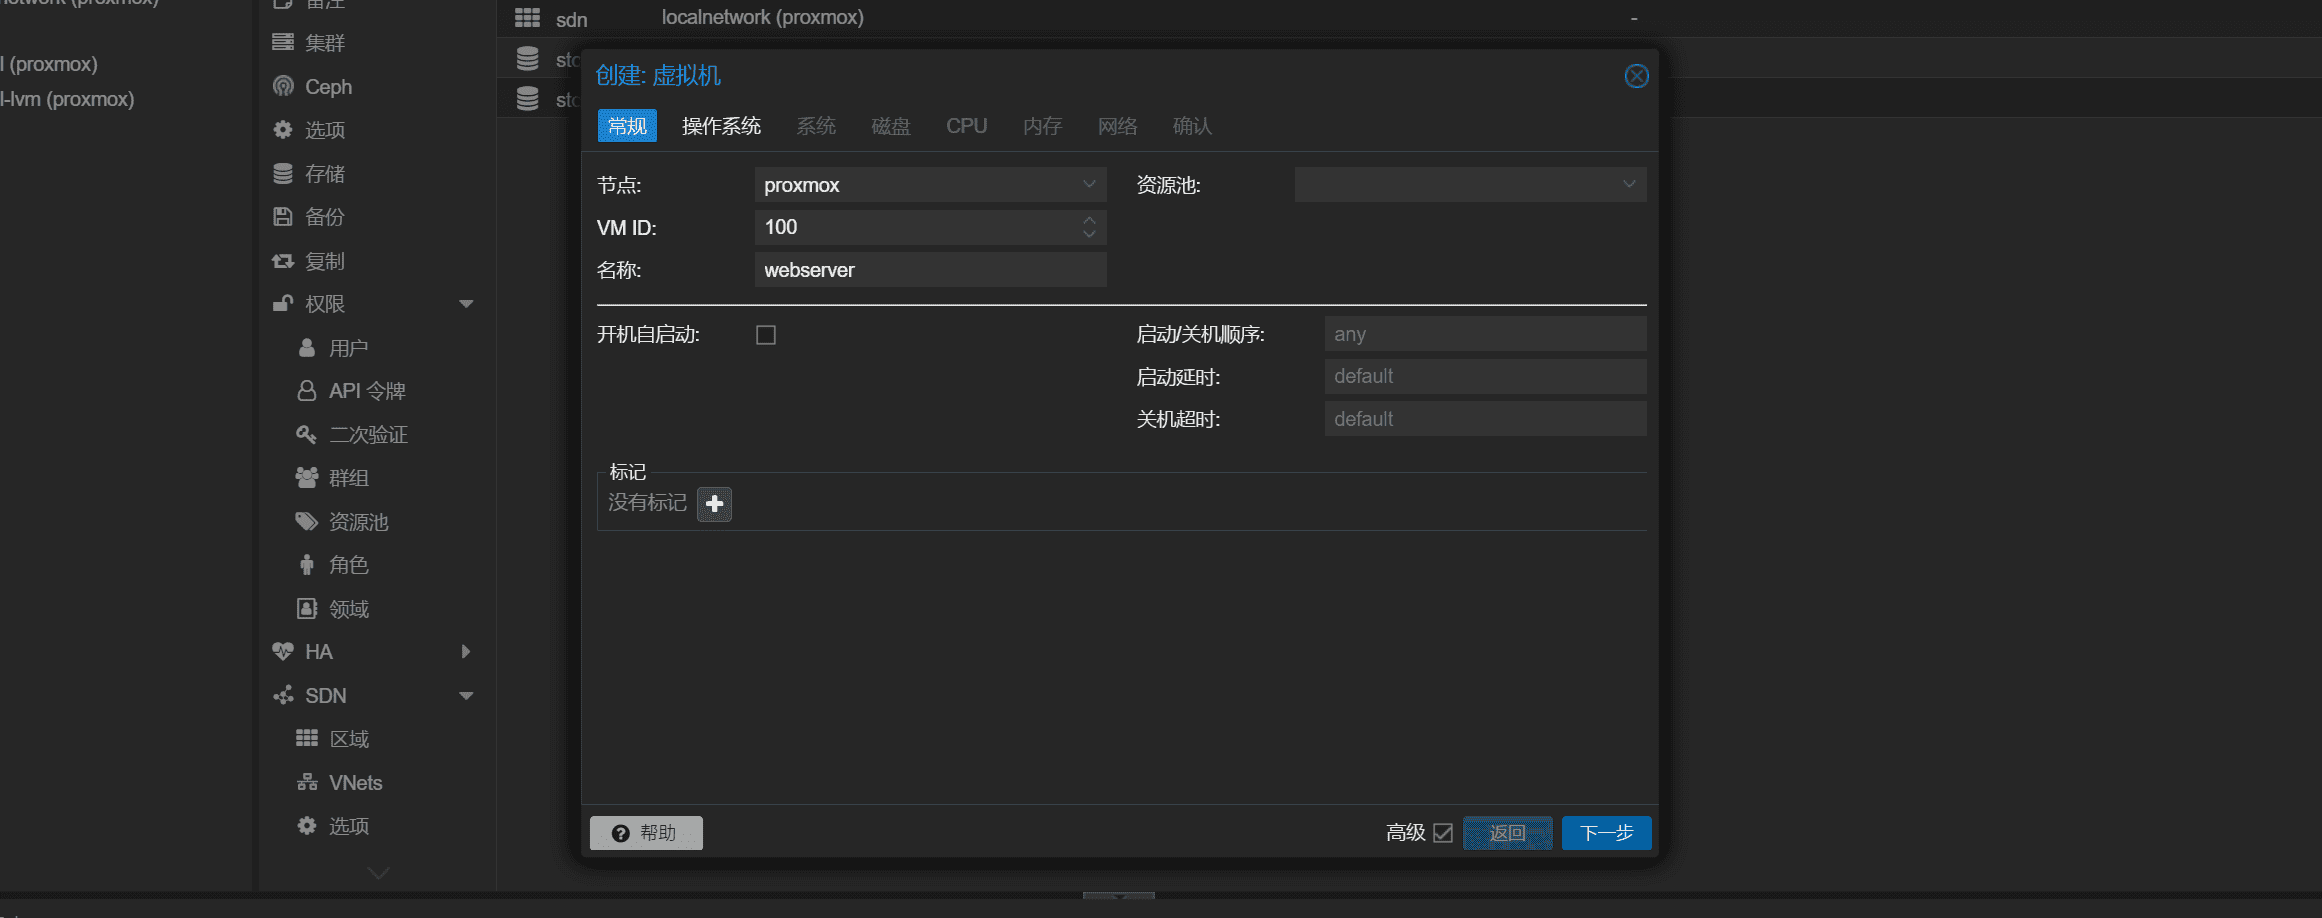
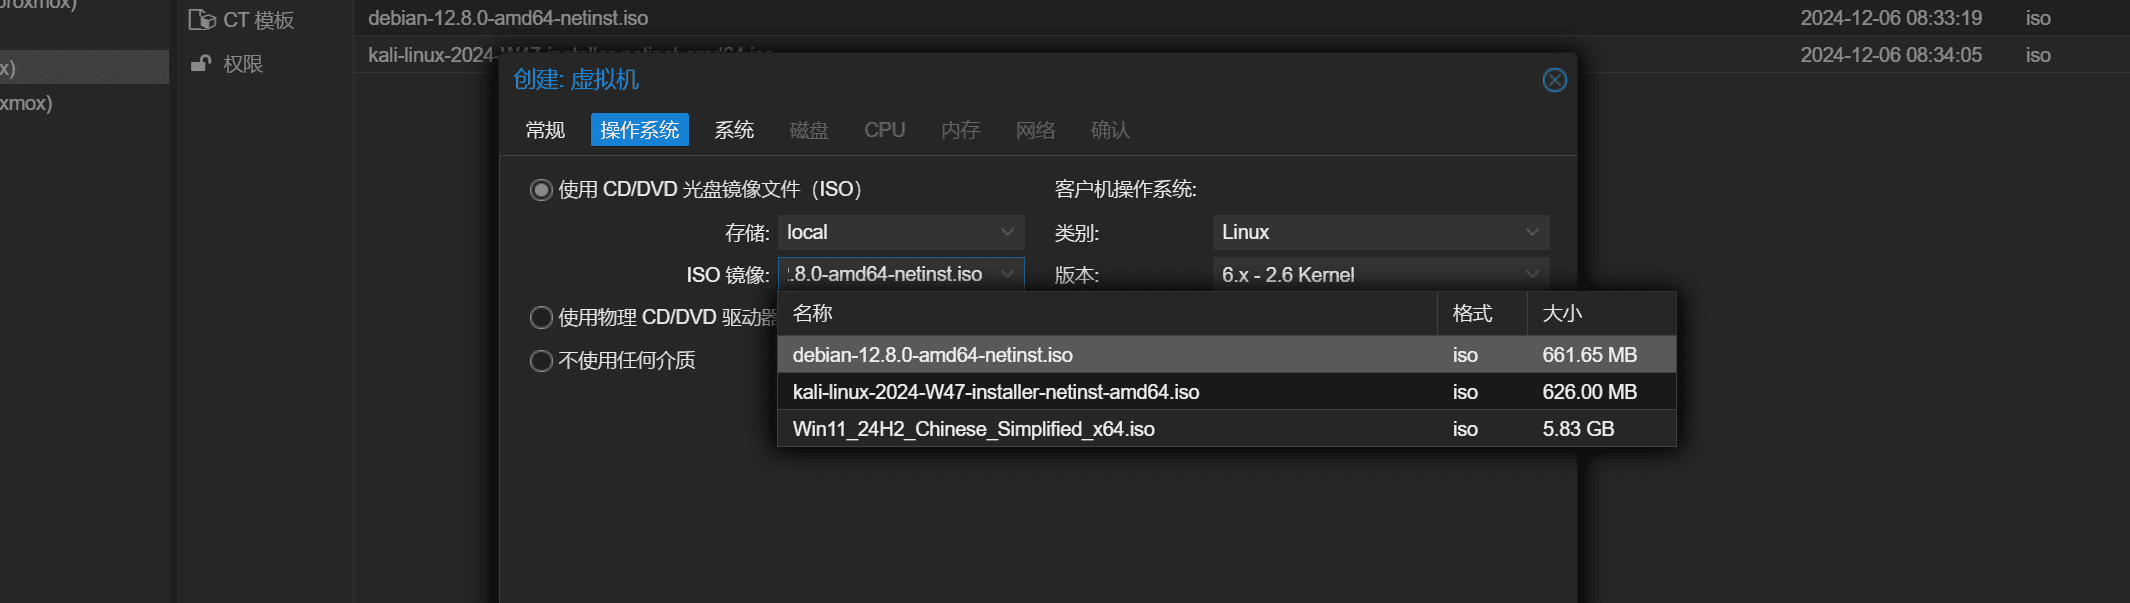
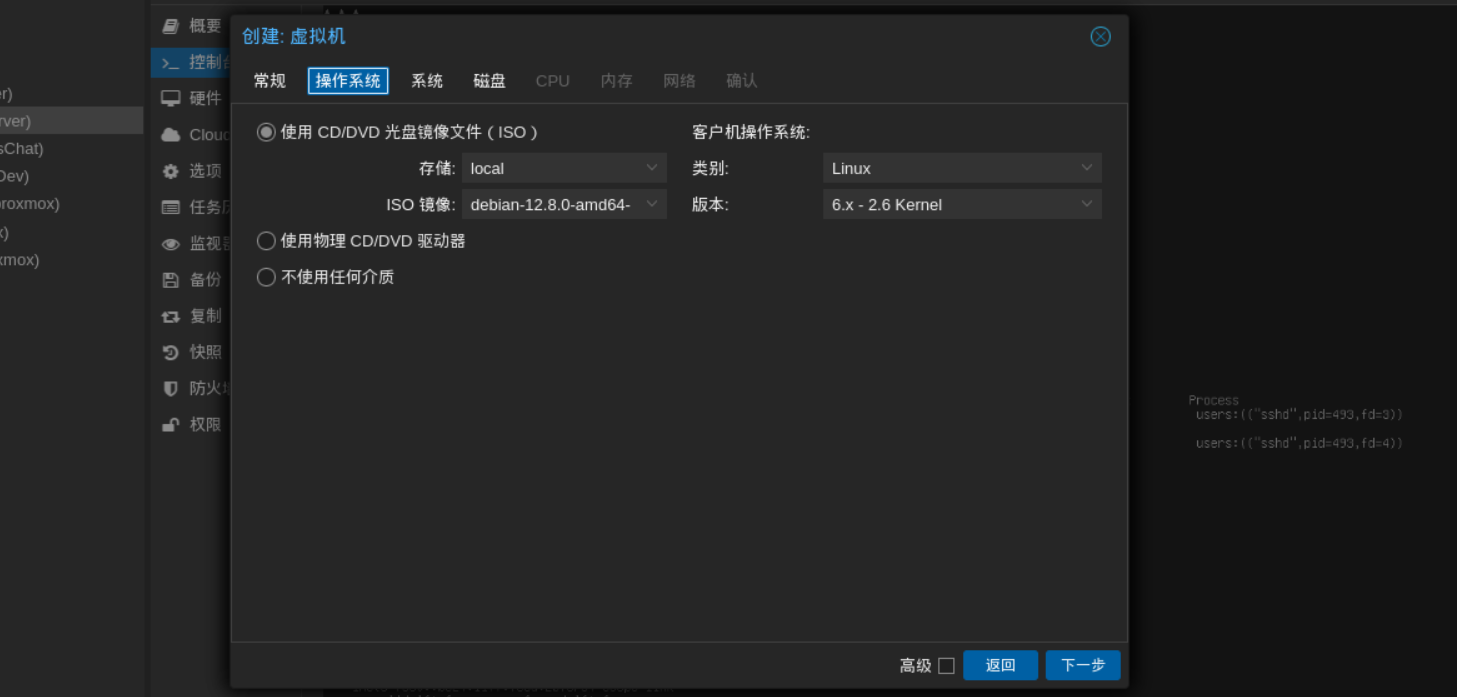
创建虚拟机可以点击右上角创建虚拟机,名称可以自定义,VM ID是虚拟机的编号,通常对于个人用户来说不需要在意这么多:
然后选择自己上传后的镜像:
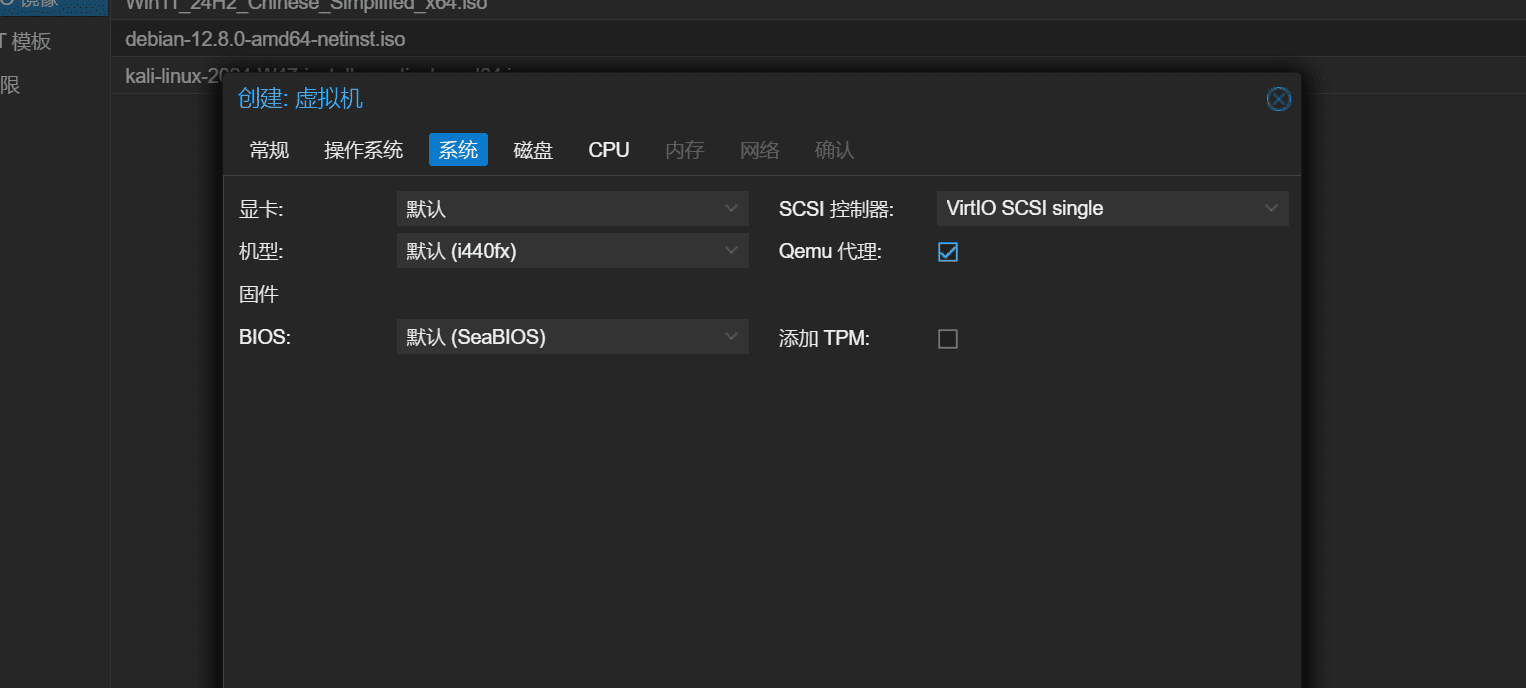
有个Qemu代理建议开启:
开启的好处:
更好的管理体验:
可以在PVE界面直接看到虚拟机的IP地址
能够进行更优雅的关机操作
更精确的资源使用监控
备份相关:
支持文件系统冻结,保证备份数据一致性
更可靠的快照操作
减少数据丢失风险
维护便利:
更容易进行日常维护
更好的系统状态监控
问题排查更方便
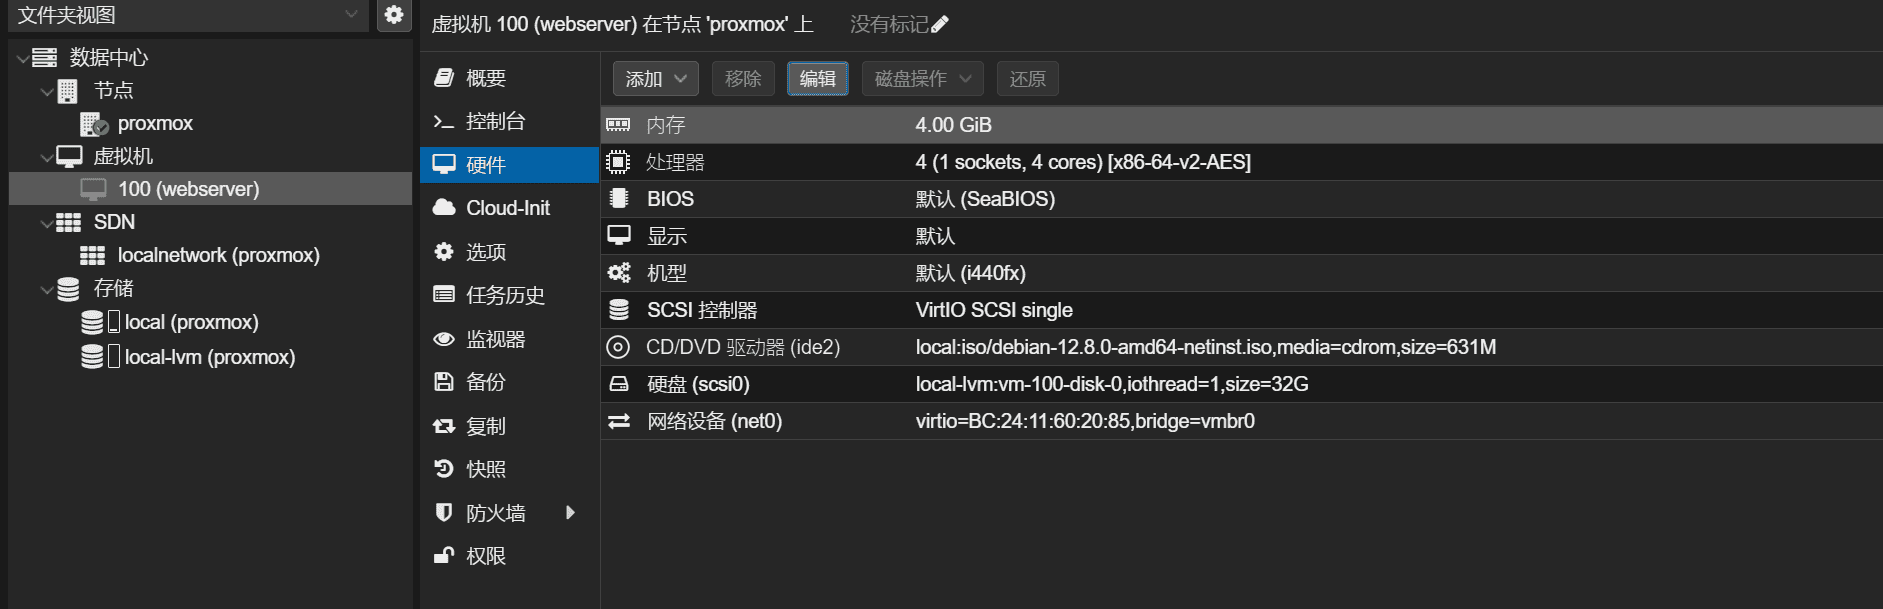
后边的配置和VMware都差不多,只用改磁盘大小和CPU核数,其他通常默认就行不需要变更,防火墙可以关闭。
后边发现配置不合适可以自行再增减:
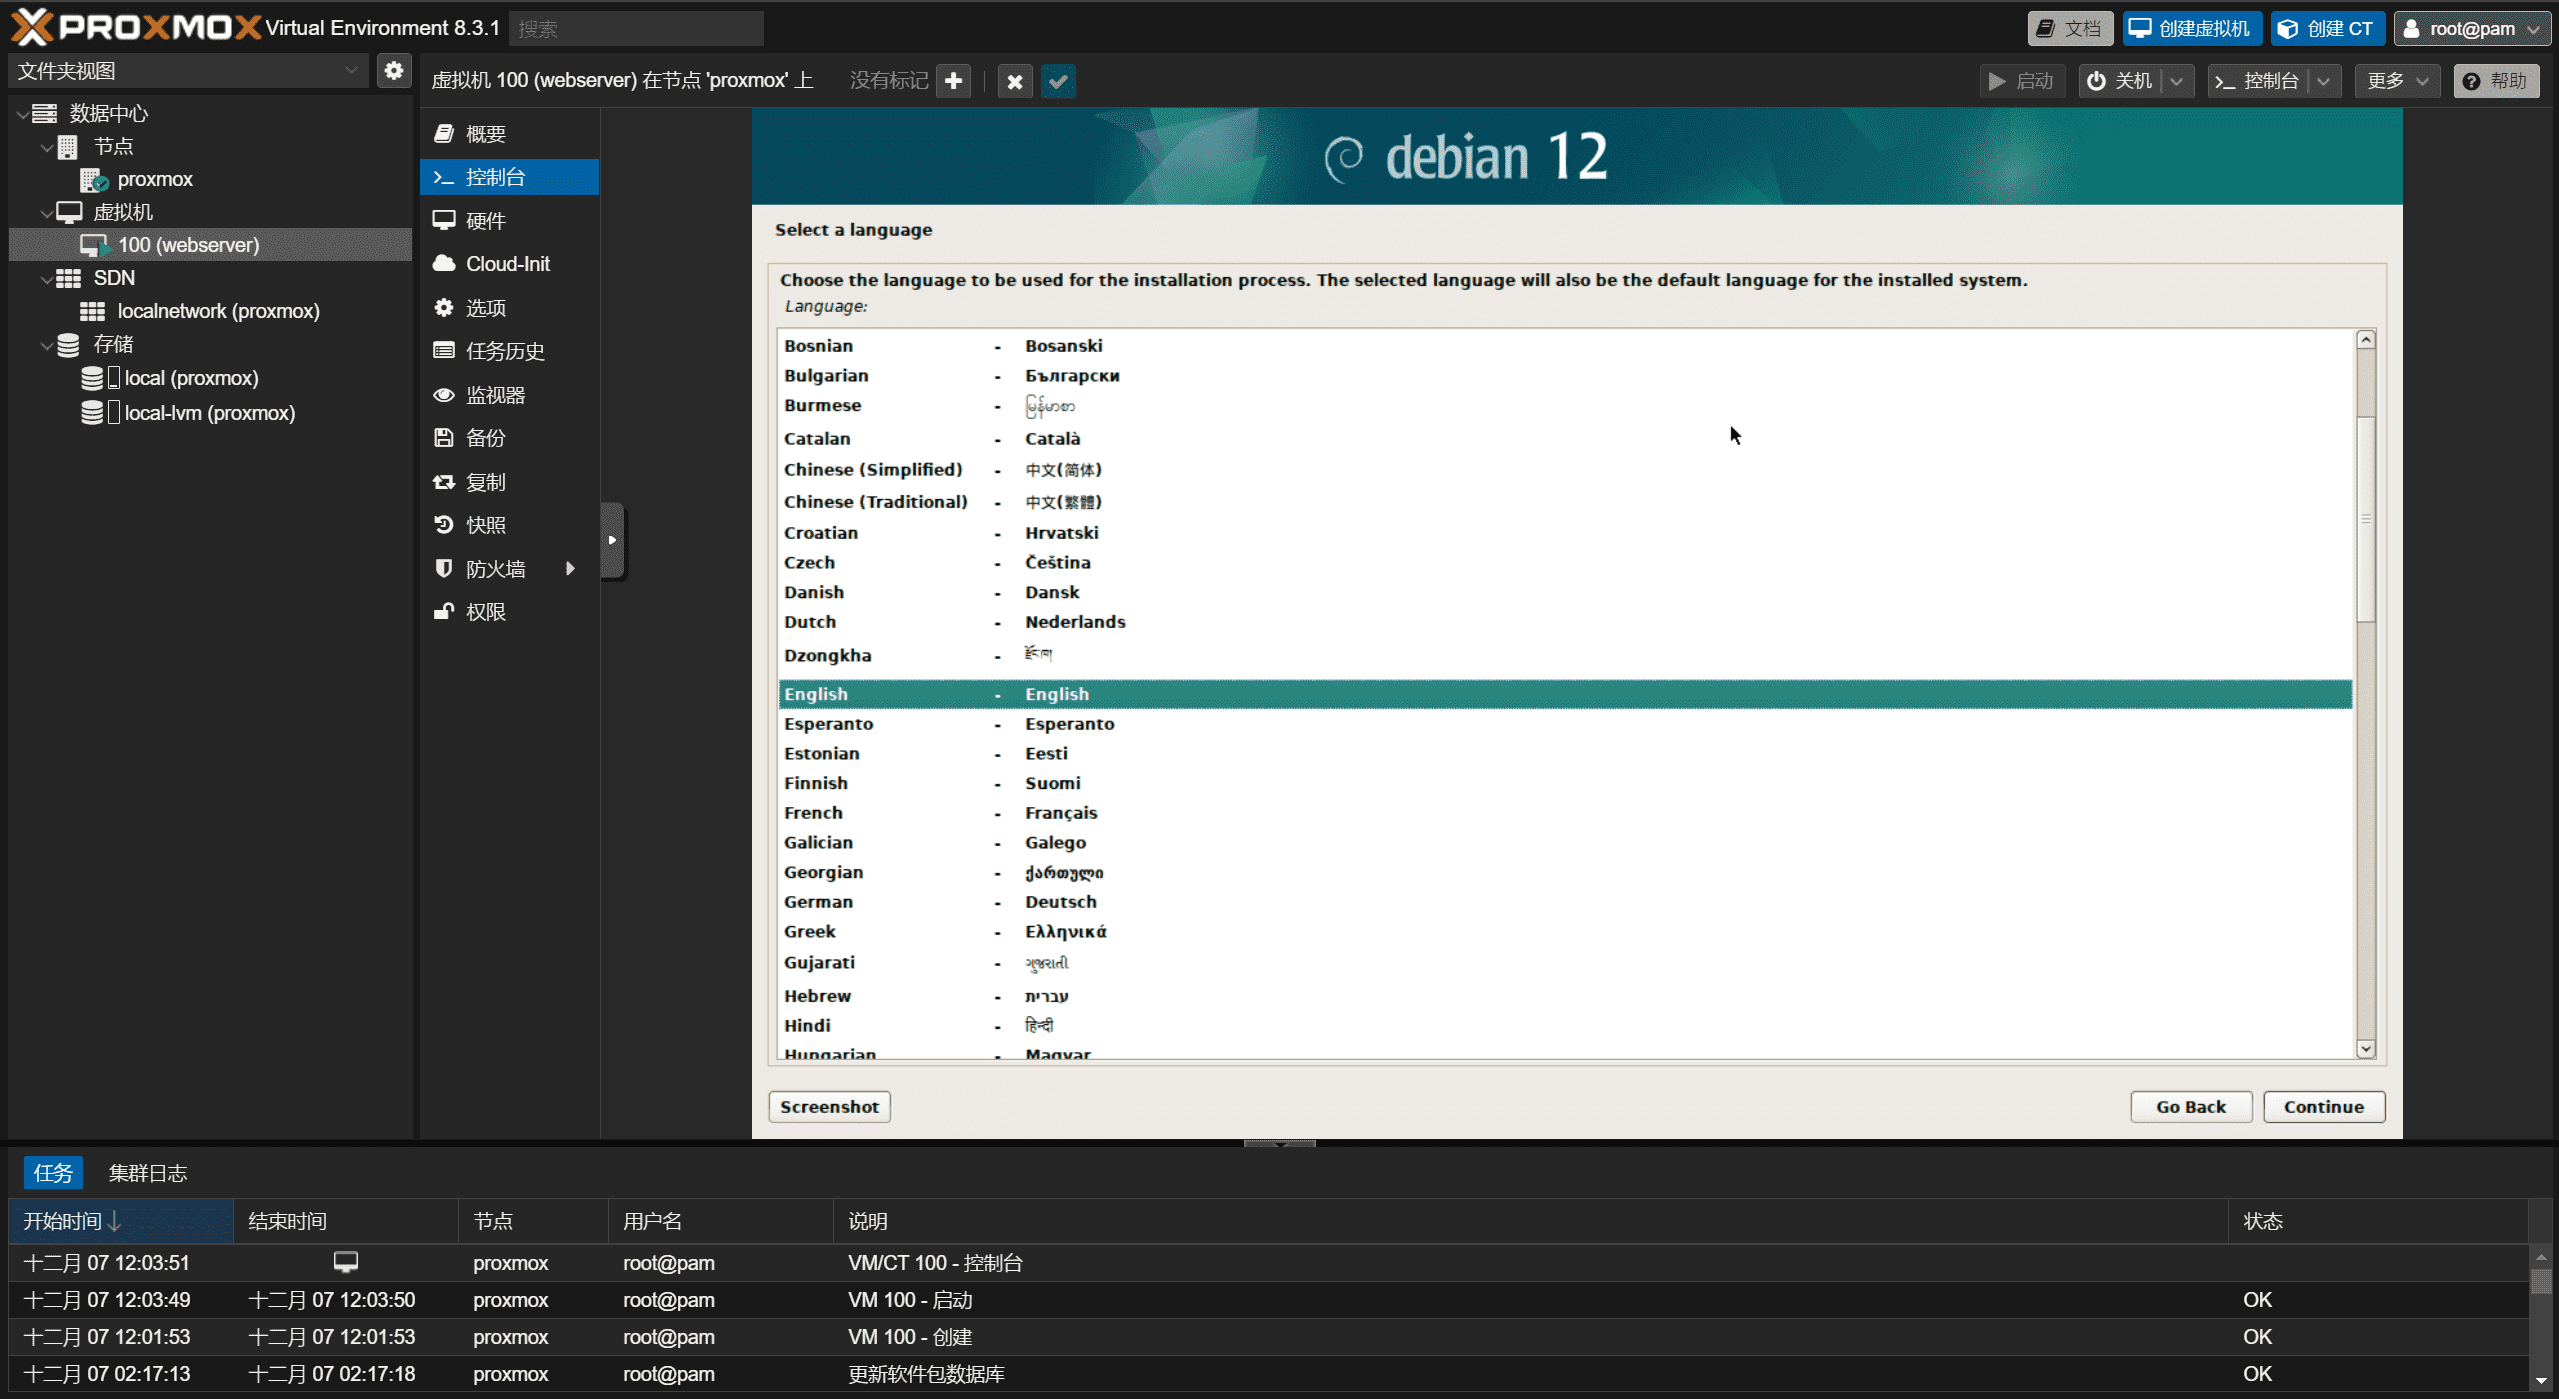
然后在控制台开启虚拟机:
虚拟机配置 PVE好像可以直接使用CT容器,但是那样IP好像就占用太多了,而且像博客诸类其实使用不多,所以我还是将其放到nginx中通过反代的方式进行。我安装了一台Debian虚拟机,未装桌面环境,本来是准备先尝试能否开启剪贴板共享的,但是搜了一下没有找到相关文章,细想了一下暂时也没这个需求,准备用这台来先构建自己的基本服务环境,我的虚拟机需求安排:
(4H8G,100GB)WinodowsChat(用来日常沟通交流聊天机,个人使用的Windows环境,以及当跳板,间接当管理机)
(4H8G,200GB)WindowsDev(用来满足自己的开发需求)
(4H8G,100GB)Webserver(用来构建自己的服务,博客)
(2H4G,64GB)Fnos(飞牛NAS,4T机械硬盘存储)
(8H32G,100GB)Fedora(部署漏扫,自动化脚本工具,Docker)
(4H8G,100GB)Kali(自己的渗透测试环境)
励志把自己手头的笔记本就当屏幕用,希望能做到只要网络通畅就可连接回去。网络组建工具:
1 https://www.zerotier.com/
1 curl -s https://install.zerotier.com | sudo bash
1 curl -fsSL https://tailscale.com/install.sh | sh
刚好用来一条主线路一条备用线路,以防止网络崩溃。
部署WindowsChat、WindowsDev 在我尝试为自己安装一台windows的时候,发现与安装linux不一样,多了一些功能按钮:
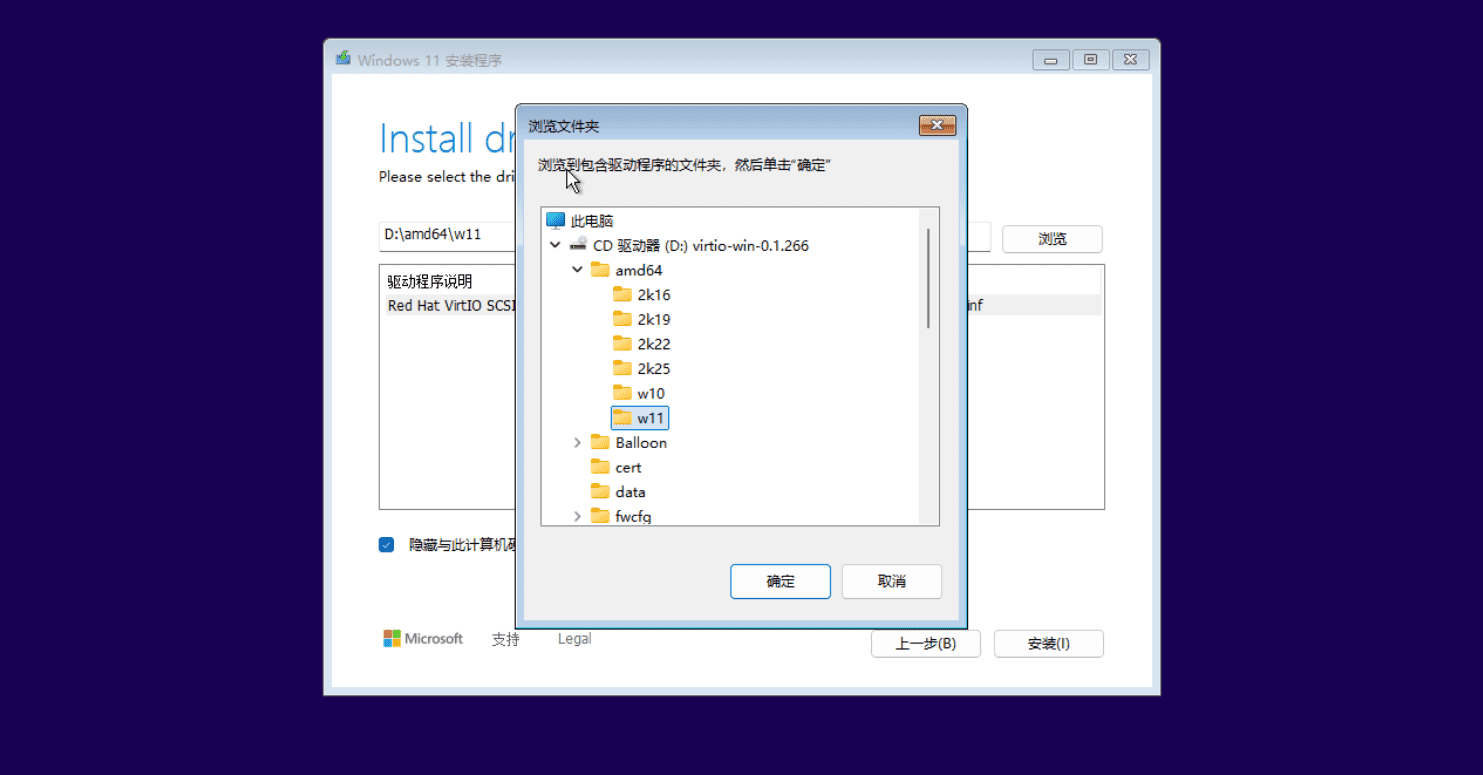
VirtIO驱动不安装可能会导致部分驱动无法正常识别,下载地址在:
1 https://fedorapeople.org/groups/virt/virtio-win/direct-downloads/archive-virtio/virtio-win-0.1.266-1/
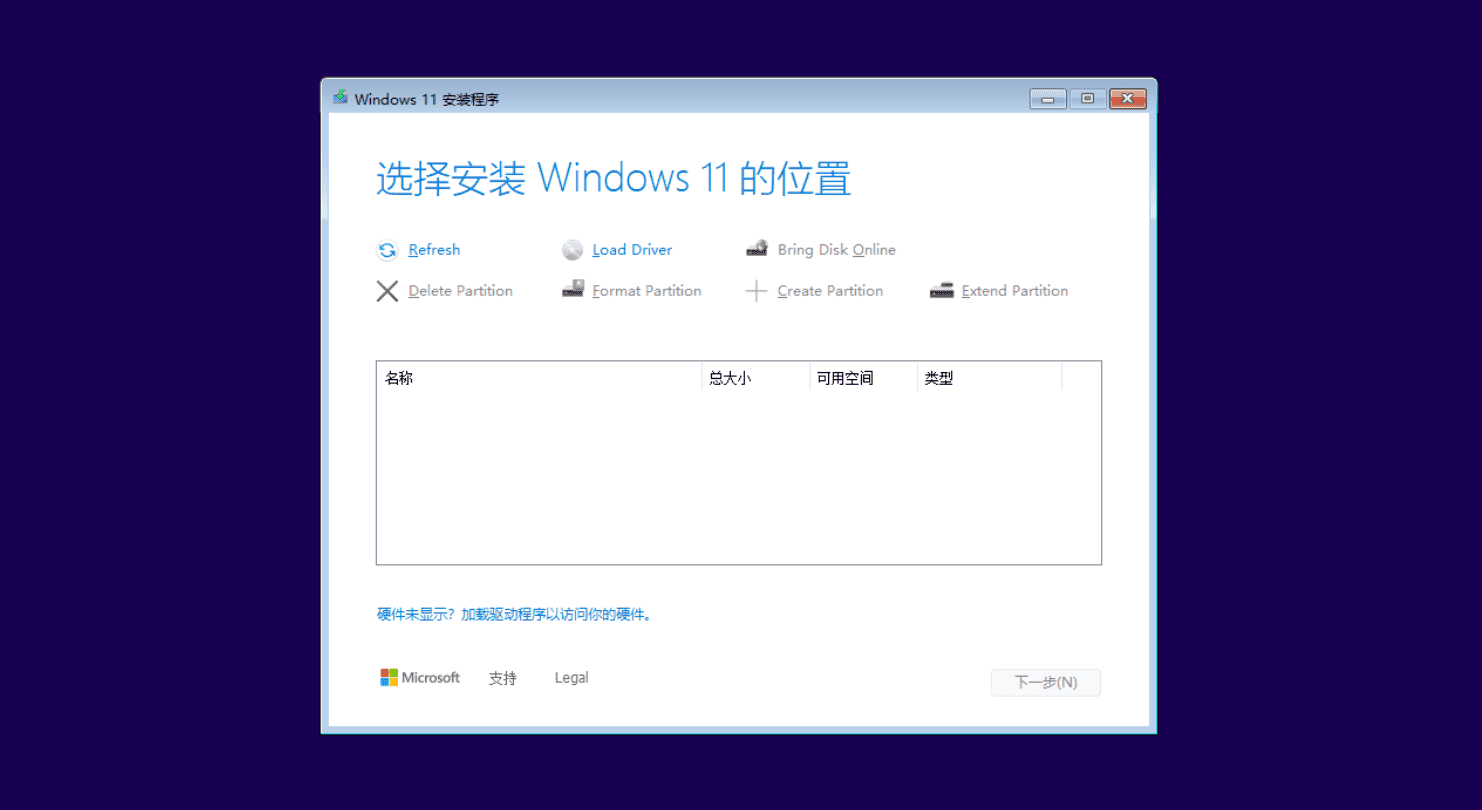
Win11必须安全引导的,不然引导起不来,除了内存和磁盘,一路保持默认就好。到这一步会加载不到磁盘:
从刚刚挂载的VirtIO驱动镜像进行安装:
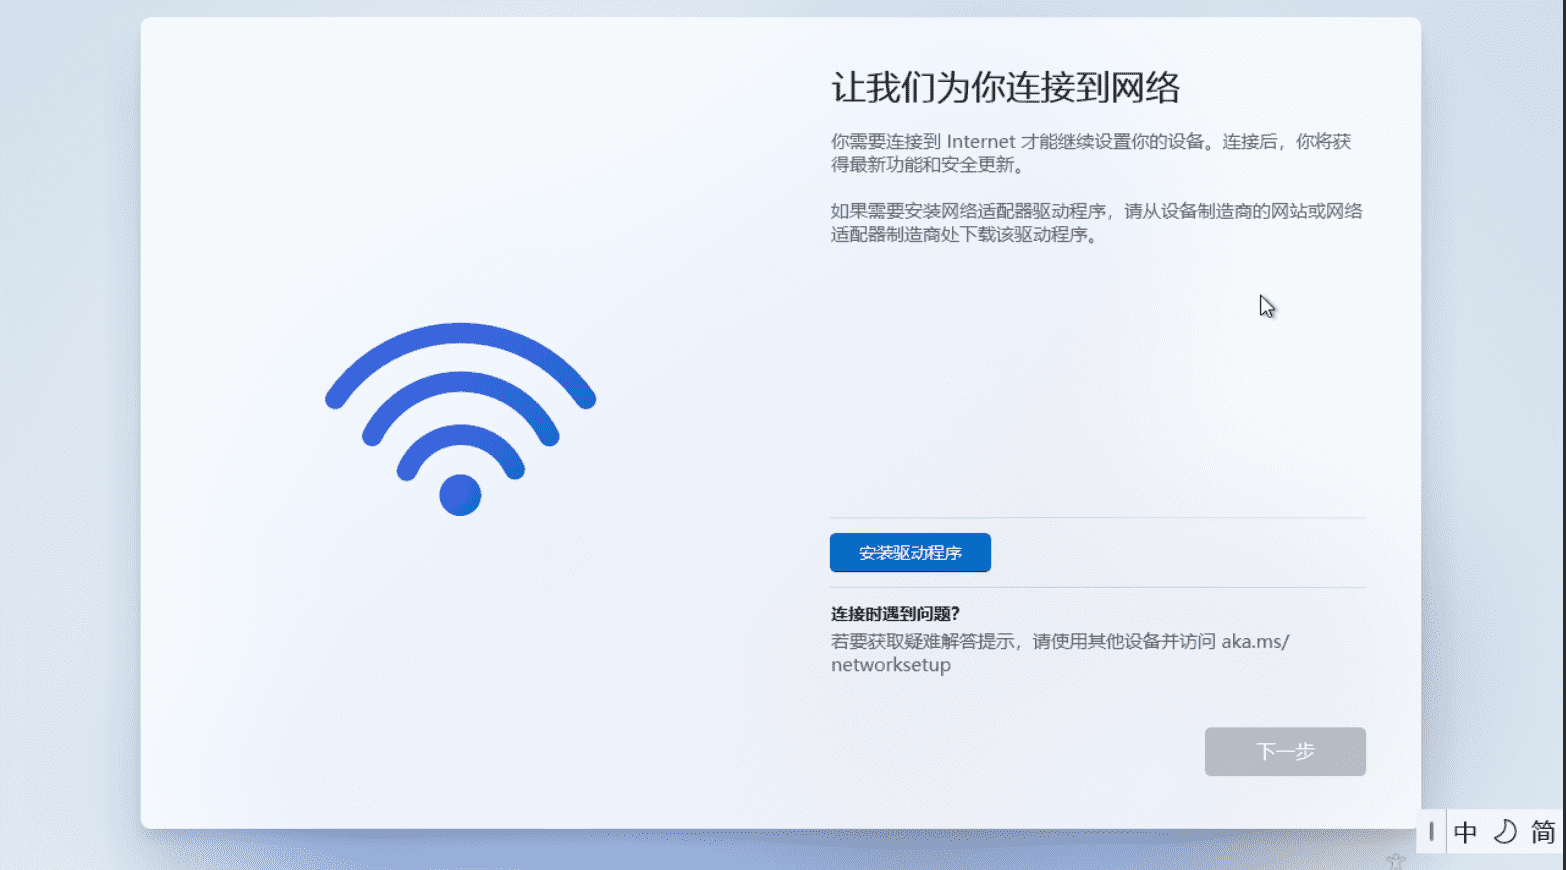
接下来正常安装就好。然后到联网激活那里会监测不到网络驱动:
然后正常点击没有网络安装完成,接着去找virtio镜像,用这个装驱动:
然后就有网卡驱动了:
windows的ZeroTier文件在以下路径,将其进行替换即可:
1 C:\ProgramData \ZeroTier \One \planet
部署Webserver Linux相对来说比较无脑简单一点:
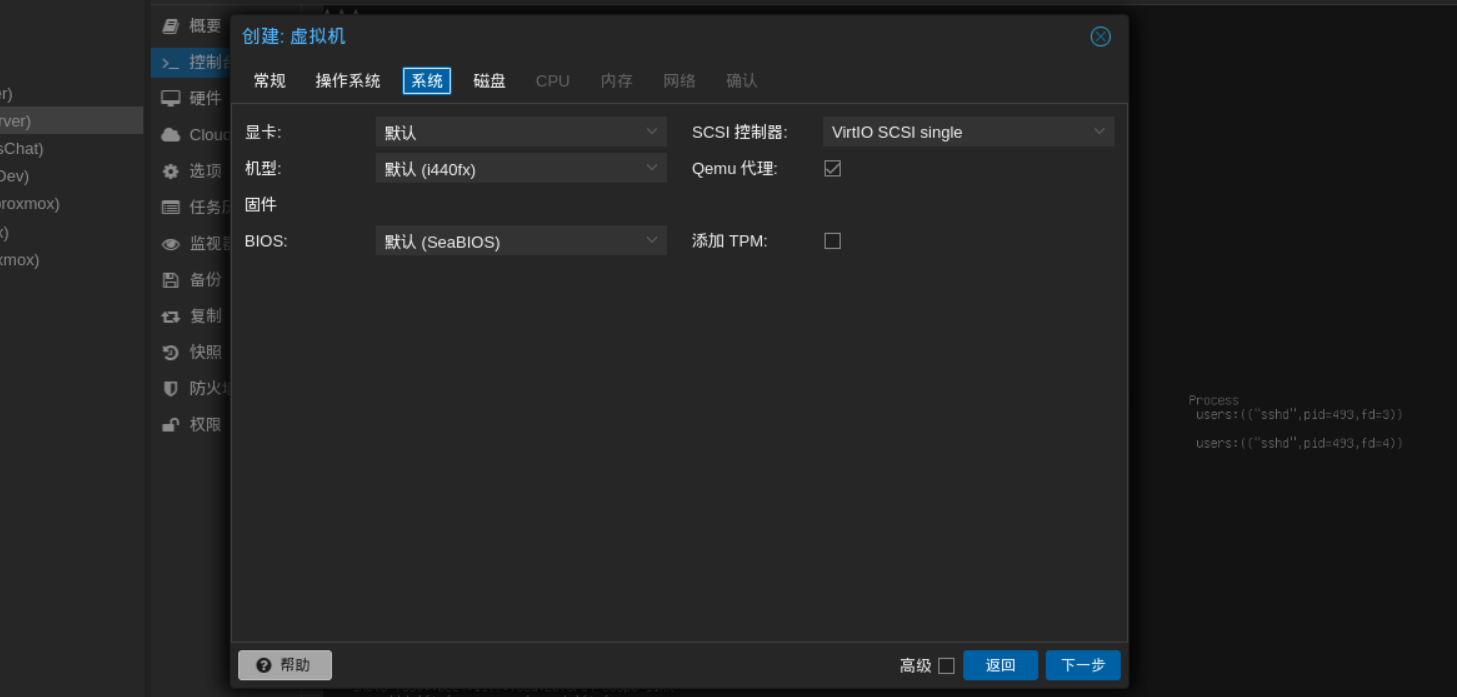
系统可以选择默认的BIOS,不需要TPM:
先从最基本的web服务开始,折腾了半天的手动编译Nginx各种报错,我决定安装宝塔了,使用宝塔国际版:
1 URL=https://www.aapanel.com/script/install_7.0_en.sh && if [ -f /usr/bin/curl ];then curl -ksSO "$URL " ;else wget --no-check-certificate -O install_7.0_en.sh "$URL " ;fi ;bash install_7.0_en.sh aapanel
随后使用宝塔编译安装nginx。然后把需要反代的配置文件统一放到/www/server/nginx/conf/vhost/目录中,便于管理。
配置Nginx 首先是最基本优化过后的nginx配置,这个是面向小型内网环境的:
1 2 3 4 5 6 7 8 9 10 11 12 13 14 15 16 17 18 19 20 21 22 23 24 25 26 27 28 29 30 31 32 33 34 35 36 37 38 39 40 41 42 43 44 45 46 47 48 49 50 51 52 53 54 55 56 57 58 59 60 61 62 63 64 65 66 67 68 69 70 71 72 73 74 75 76 77 78 79 80 81 82 83 84 85 86 87 88 89 90 91 92 93 94 95 96 97 98 99 100 101 user www www; worker_processes auto; worker_cpu_affinity auto; worker_rlimit_nofile 10240; error_log /www/wwwlogs/nginx_error.log crit; pid /www/server/nginx/logs/nginx.pid; stream { log_format tcp_format '$time_local|$remote_addr|$protocol|$status|$bytes_sent|$bytes_received|$session_time|$upstream_addr|$upstream_bytes_sent|$upstream_bytes_received|$upstream_connect_time' ; access_log /www/wwwlogs/tcp-access.log tcp_format; error_log /www/wwwlogs/tcp-error.log; include /www/server/panel/vhost/nginx/tcp/*.conf; } events { use epoll; worker_connections 2048; multi_accept on; accept_mutex on; accept_mutex_delay 5ms; } http { include mime.types; include proxy.conf; lua_package_path "/www/server/nginx/lib/lua/?.lua;;" ; default_type application/octet-stream; server_names_hash_bucket_size 512; server_names_hash_max_size 512; client_header_buffer_size 16k; large_client_header_buffers 2 16k; client_max_body_size 200m; client_header_timeout 30s; client_body_timeout 30s; sendfile on; tcp_nopush on; tcp_nodelay on; keepalive_timeout 30; keepalive_requests 500; reset_timedout_connection on; fastcgi_connect_timeout 180; fastcgi_send_timeout 180; fastcgi_read_timeout 180; fastcgi_buffer_size 64k; fastcgi_buffers 4 64k; fastcgi_busy_buffers_size 128k; fastcgi_temp_file_write_size 256k; fastcgi_intercept_errors on; gzip on; gzip_min_length 1k; gzip_buffers 4 16k; gzip_http_version 1.1; gzip_comp_level 6; gzip_types text/plain text/css application/json application/javascript; gzip_vary on; gzip_proxied any; gzip_disable "MSIE [1-6]\." ; open_file_cache max=1000 inactive=10s; open_file_cache_valid 15s; open_file_cache_min_uses 2; open_file_cache_errors on; limit_conn_zone $binary_remote_addr zone=perip:5m; limit_conn_zone $server_name zone=perserver:5m; limit_req_zone $binary_remote_addr zone=req_limit:5m rate=50r/s; map $http_upgrade $connection_upgrade { default upgrade; '' close; } ssl_session_cache shared:SSL:5m; ssl_session_timeout 4h; include /www/server/panel/vhost/nginx/*.conf; include /www/server/nginx/conf/vhost/*.conf; }
在我的配置清单中都格外做了日志功能,在/www/wwwlogs/中,有个好处就是可以根据报错日志进行排错维护。
配置kodcloud 创建一个docker文件:
因为我不用Mysql,所以我将mysql给去掉了:
1
2
3
4
5
6
7
8
9
10
11
12
13
14
15
16
17
18
19
20
21
22
23
24
25
26
27
28
29
30
version: '3.5' services: app: image: kodcloud/kodbox restart: always volumes: - "./site:/var/www/html" environment: - REDIS_HOST=redis depends_on: - redis networks: kodcloud_network: ipv4_address: 172.19.0.2 redis: image: redis:alpine restart: always networks: kodcloud_network: ipv4_address: 172.19.0.3 networks: kodcloud_network: driver: bridge ipam: config: - subnet: 172.19.0.0/16 name: kodcloud_network
给debianserver申请个证书:
1 sudo tailscale cert target.domain
配置nginx反代:
1
2
3
4
5
6
7
8
9
10
11
12
13
14
15
16
17
18
19
20
21
22
23
24
25
26
27
28
29
30
31
32
33
34
35
36
37
38
39
40
server { listen 443 ssl; server_name debianserver.uaru-rudd.ts.net; ssl_certificate /www/Certs/debianserver.uaru-rudd.ts.net.crt; ssl_certificate_key /www/Certs/debianserver.uaru-rudd.ts.net.key; location / { proxy_pass http://172.19.0.2; proxy_set_header Host $host ; proxy_set_header X-Real-IP $remote_addr ; proxy_set_header X-Forwarded-For $proxy_add_x_forwarded_for ; proxy_set_header X-Forwarded-Proto $scheme ; proxy_http_version 1.1; proxy_set_header Upgrade $http_upgrade ; proxy_set_header Connection "upgrade" ; proxy_connect_timeout 60s; proxy_send_timeout 60s; proxy_read_timeout 60s; client_max_body_size 1024m; } add_header X-Content-Type-Options nosniff; add_header X-Frame-Options SAMEORIGIN; add_header X-XSS-Protection "1; mode=block" ; }
配置aapanel 先给宝塔配置了:
1 sudo vim /www/server/nginx/conf/vhost/bt.conf
1
2
3
4
5
6
7
8
9
10
11
12
13
14
15
16
17
18
19
20
21
22
23
24
25
26
27
28
29
30
server { listen 443 ssl; listen [::]:443 ssl; http2 on; server_name bt.domain.name; ssl_certificate /www/Certs/domain.name.cer; ssl_certificate_key /www/Certs/domain.name.key; ssl_protocols TLSv1.2 TLSv1.3; location / { proxy_redirect off; proxy_pass https://127.0.0.1:10000; proxy_set_header Host $host ; proxy_set_header X-Real-IP $remote_addr ; proxy_set_header X-Forwarded-For $proxy_add_x_forwarded_for ; proxy_set_header X-Forwarded-Proto https; proxy_http_version 1.1; proxy_set_header Upgrade $http_upgrade ; proxy_set_header Connection "upgrade" ; } access_log /www/wwwlogs/bt.log combined; error_log /www/wwwlogs/bt.error.log warn; }
配置passbolt 接下来是密码管理器,先根据官方文档安装docker:
1
2
3
4
5
6
7
8
9
sudo apt update sudo apt install apt-transport-https ca-certificates curl software-properties-common curl -fsSL https://download.docker.com/linux/debian/gpg | sudo gpg --dearmor -o /usr/share/keyrings/docker-archive-keyring.gpg echo "deb [arch=$(dpkg --print-architecture) signed-by=/usr/share/keyrings/docker-archive-keyring.gpg] https://download.docker.com/linux/debian $(lsb_release -cs) stable" | sudo tee /etc/apt/sources.list.d/docker.list > /dev/null sudo apt update sudo apt install docker-ce
安装docker-compose最新版本:
1 https://github.com/docker/compose/releases
1 sudo cp docker-compose /usr/local/bin/ && chmod +x /usr/local/bin/docker-compose
docker文件我做了一些变更,因为有时候重启docker容器的IP地址会出现变化,我将其在文件中写死固定,可以为将来省很多人力维护成本,而且,反代不需要给docker容器配置端口:
1
2
3
4
5
6
7
8
9
10
11
12
13
14
15
16
17
18
19
20
21
22
23
24
25
26
27
28
29
30
31
32
33
34
35
36
37
38
39
40
41
42
43
44
45
46
47
48
49
50
51
52
53
54
55
56
version: "3.9" services: db: image: mariadb:10.11 restart: unless-stopped environment: MYSQL_RANDOM_ROOT_PASSWORD: "true" MYSQL_DATABASE: "$YOUR_DB " MYSQL_USER: "$YOUR_USER " MYSQL_PASSWORD: "$YOUR_PASSWD " volumes: - database_volume:/var/lib/mysql networks: passbolt_network: ipv4_address: 172.18.0.2 passbolt: image: passbolt/passbolt:latest-ce restart: unless-stopped depends_on: - db environment: APP_FULL_BASE_URL: https://pwd.domain.name DATASOURCES_DEFAULT_HOST: "db" DATASOURCES_DEFAULT_USERNAME: "$YOUR_USER " DATASOURCES_DEFAULT_PASSWORD: "$YOUR_PASSWD " DATASOURCES_DEFAULT_DATABASE: "$YOUR_PASSWD " volumes: - gpg_volume:/etc/passbolt/gpg - jwt_volume:/etc/passbolt/jwt command : [ "/usr/bin/wait-for.sh" , "-t" , "0" , "db:3306" , "--" , "/docker-entrypoint.sh" , ] networks: passbolt_network: ipv4_address: 172.18.0.3 volumes: database_volume: gpg_volume: jwt_volume: networks: passbolt_network: driver: bridge ipam: config: - subnet: 172.18.0.0/16 name: passbolt_network
启动容器:
1 sudo docker-compose -f docker-compose-ce.yaml up -d
在nginx中配置反向代理:
1 sudo vim /www/server/nginx/conf/vhost/pwd.conf
1
2
3
4
5
6
7
8
9
10
11
12
13
14
15
16
17
18
19
20
21
22
23
24
25
26
27
28
29
30
31
32
33
34
35
36
37
38
39
40
41
42
43
44
45
46
47
48
49
50
51
52
53
54
55
56
57
58
59
60
61
62
63
64
65
66
67
68
69
70
71
72
73
74
75
76
server { listen 443 ssl; listen [::]:443 ssl; http2 on; server_name pwd.domain.name; access_log /www/wwwlogs/Passbolt_access.log combined buffer=512k flush=1m; error_log /www/wwwlogs/Passbolt_error.log warn; ssl_certificate /www/Certs/domain.name.cer; ssl_certificate_key /www/Certs/domain.name.key; ssl_session_timeout 1h; ssl_protocols TLSv1.2 TLSv1.3; ssl_ciphers HIGH:!aNULL:!MD5; add_header Strict-Transport-Security "max-age=31536000" always; add_header X-Content-Type-Options nosniff always; add_header X-Frame-Options SAMEORIGIN always; access_log /www/wwwlogs/pwd.access.log combined buffer=32k; error_log /www/wwwlogs/pwd.error.log warn; server_tokens off; client_max_body_size 5m; client_body_buffer_size 32k; client_body_timeout 15s; client_header_timeout 15s; keepalive_timeout 20s; keepalive_requests 50; location / { proxy_pass https://172.18.0.3; proxy_buffers 4 32k; proxy_buffer_size 32k; proxy_busy_buffers_size 96k; proxy_connect_timeout 15s; proxy_send_timeout 15s; proxy_read_timeout 15s; proxy_set_header Host $host ; proxy_set_header X-Real-IP $remote_addr ; proxy_set_header X-Forwarded-For $proxy_add_x_forwarded_for ; proxy_set_header X-Forwarded-Proto $scheme ; add_header Cache-Control "no-store, no-cache, must-revalidate" ; expires 0; } location ~* \.(css|js|gif|jpeg|png|ico|svg)$ { proxy_pass https://172.18.0.3; expires 1h; add_header Cache-Control "public, no-transform" ; access_log off; } location /healthz { access_log off; return 200 "healthy\n" ; } }
为自己注册一个账号:
1 docker exec passbolt su -m -c "bin/cake passbolt register_user -u your@email.com -f yourname -l surname -r admin" -s /bin/sh www-data
点击注册链接进行注册,然后将之前密码管理从之前的环境导出,再导入就可以完美迁移。
配置Code-server 安装Code-server:
1 curl -fsSL https://code-server.dev/install.sh | sh
配置Codeserver文件:
1 vim $HOME /.config/code-server/config.yaml
1
2
3
4
5
6
7
8
9
bind-addr: 127.0.0.1:8080 auth: password password: ********************** cert: false disable-telemetry: true disable-update-check: true disable-workspace-trust: true user-data-dir: /root/.config/code-server extensions-dir: /root/.config/code-server/extensions
配置反向代理:
1 sudo vim /www/server/nginx/conf/vhost/code.conf
1
2
3
4
5
6
7
8
9
10
11
12
13
14
15
16
17
18
19
20
21
22
23
24
25
26
27
28
29
30
31
32
33
34
35
36
37
38
39
40
41
42
43
44
45
46
47
48
49
server { listen 443 ssl; http2 on; server_name codeserver.pve.domain.name; ssl_certificate /www/Certs/pve.domain.name.cer; ssl_certificate_key /www/Certs/pve.domain.name.key; access_log /www/wwwlogs/code-server_access.log combined buffer=512k flush=1m; error_log /www/wwwlogs/code-server_error.log warn; ssl_session_cache shared:SSL:10m; ssl_session_timeout 10m; ssl_prefer_server_ciphers on; ssl_protocols TLSv1.2 TLSv1.3; ssl_ciphers ECDHE-ECDSA-AES128-GCM-SHA256:ECDHE-RSA-AES128-GCM-SHA256:ECDHE-ECDSA-AES256-GCM-SHA384:ECDHE-RSA-AES256-GCM-SHA384:ECDHE-ECDSA-CHACHA20-POLY1305:ECDHE-RSA-CHACHA20-POLY1305:DHE-RSA-AES128-GCM-SHA256:DHE-RSA-AES256-GCM-SHA384; sendfile on; tcp_nopush on; tcp_nodelay on; keepalive_timeout 65; types_hash_max_size 2048; location / { proxy_pass http://localhost:8080; proxy_set_header Host $host ; proxy_set_header Upgrade $http_upgrade ; proxy_set_header Connection "upgrade" ; proxy_set_header Accept-Encoding gzip; proxy_set_header X-Real-IP $remote_addr ; proxy_set_header X-Forwarded-For $proxy_add_x_forwarded_for ; proxy_set_header X-Forwarded-Proto $scheme ; proxy_http_version 1.1; proxy_buffering off; proxy_read_timeout 86400; proxy_send_timeout 86400; proxy_connect_timeout 60s; } }
配置开机自启,创建普通用户层级的,不要系统层级的:
1 mkdir -p ~/.config/systemd/user/
1 vim ~/.config/systemd/user/code-server.service
1
2
3
4
5
6
7
8
9
10
11
12
13
14
15
16
17
18
19
20
21
22
23
24
[Unit] Description=Code Server After=network.target [Service] Type=simple Environment=NODE_OPTIONS=--max-old-space-size=1024 ExecStart=/usr/bin/code-server Restart=always RestartSec=10 MemoryMax=2G MemoryHigh=1.5G MemoryLow=512M CPUQuota=150% CPUWeight=100 LimitNOFILE=65535 OOMScoreAdjust=-100 [Install] WantedBy=default.target
重载服务:
1 2 3 4 5 6 7 8 systemctl --user daemon-reload systemctl --user enable code-server systemctl --user start code-server
配置PVE 每次点开PVE都得点浏览器证书不受信任,最主要是还得加端口才能访问,我试过iptables,效果一般,所以也直接用这台web服务器的nginx做反向代理:
1 sudo vim /www/server/nginx/conf/vhost/pve.conf
1
2
3
4
5
6
7
8
9
10
11
12
13
14
15
16
17
18
19
20
21
22
23
24
25
26
27
28
29
30
31
32
33
34
35
36
37
38
39
40
41
42
43
44
45
46
server { listen 443 ssl; server_name pve.domain.name; ssl_certificate /www/Certs/pve.domain.name.cer; ssl_certificate_key /www/Certs/pve.domain.name.key; access_log /www/wwwlogs/proxmox_access.log combined buffer=512k flush=1m; error_log /www/wwwlogs/proxmox_error.log warn; client_max_body_size 100G; client_body_buffer_size 1M; client_body_timeout 3600s; location / { proxy_pass https://100.64.233.10:8006; proxy_http_version 1.1; proxy_set_header Upgrade $http_upgrade ; proxy_set_header Connection "upgrade" ; proxy_set_header Host $host ; proxy_set_header X-Real-IP $remote_addr ; proxy_set_header X-Forwarded-For $proxy_add_x_forwarded_for ; proxy_set_header X-Forwarded-Proto $scheme ; proxy_redirect off; proxy_buffering off; proxy_connect_timeout 3600s; proxy_send_timeout 3600s; proxy_read_timeout 3600s; send_timeout 3600s; } keepalive_timeout 650; send_timeout 600; }
这下就没告警了。
配置Blog 安装nodejs:
1
2
curl -fsSL https://deb.nodesource.com/setup_22.x | sudo bash - apt install nodejs
安装hexo:
将之前打包备份好的博客解压到自己安排的目录,进入目录然后安装依赖:
配置nginx反向代理:
1 sudo vim /www/server/nginx/conf/vhost/blog.conf
1 2 3 4 5 6 7 8 9 10 11 12 13 14 15 16 17 18 19 20 21 22 23 24 25 26 27 server { listen 443 ssl; listen [::]:443 ssl; http2 on; server_name blog.domain.name; ssl_certificate /www/Certs/domain.name.cer; ssl_certificate_key /www/Certs/domain.name.key; ssl_protocols TLSv1.2 TLSv1.3; access_log /www/wwwlogs/blog_access.log combined; error_log /www/wwwlogs/blog_error.log; root /www/wwwroot/Blog/public; index index.html index.htm; location / { try_files $uri $uri / /index.html; } location ~* \.(jpg|jpeg|png|gif|css|js|ico|svg)$ { expires 30d; } }
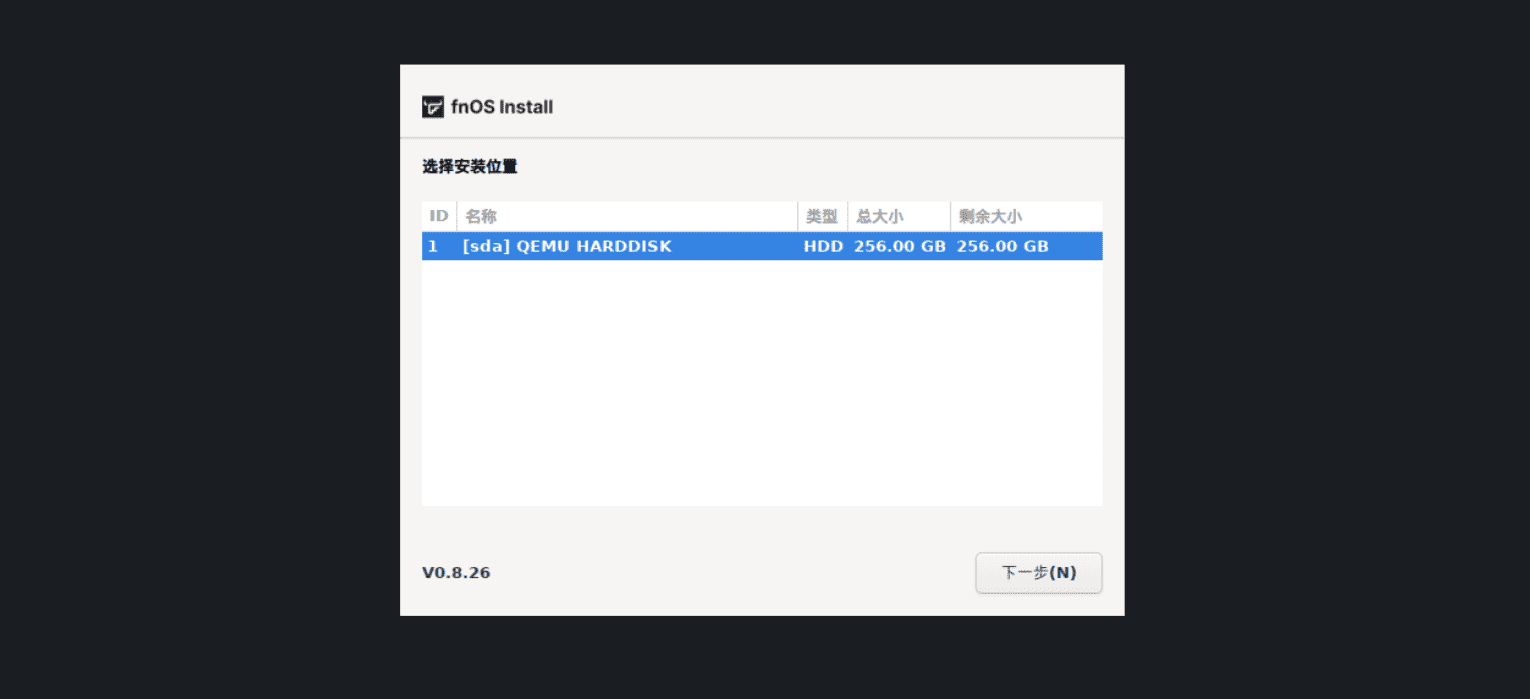
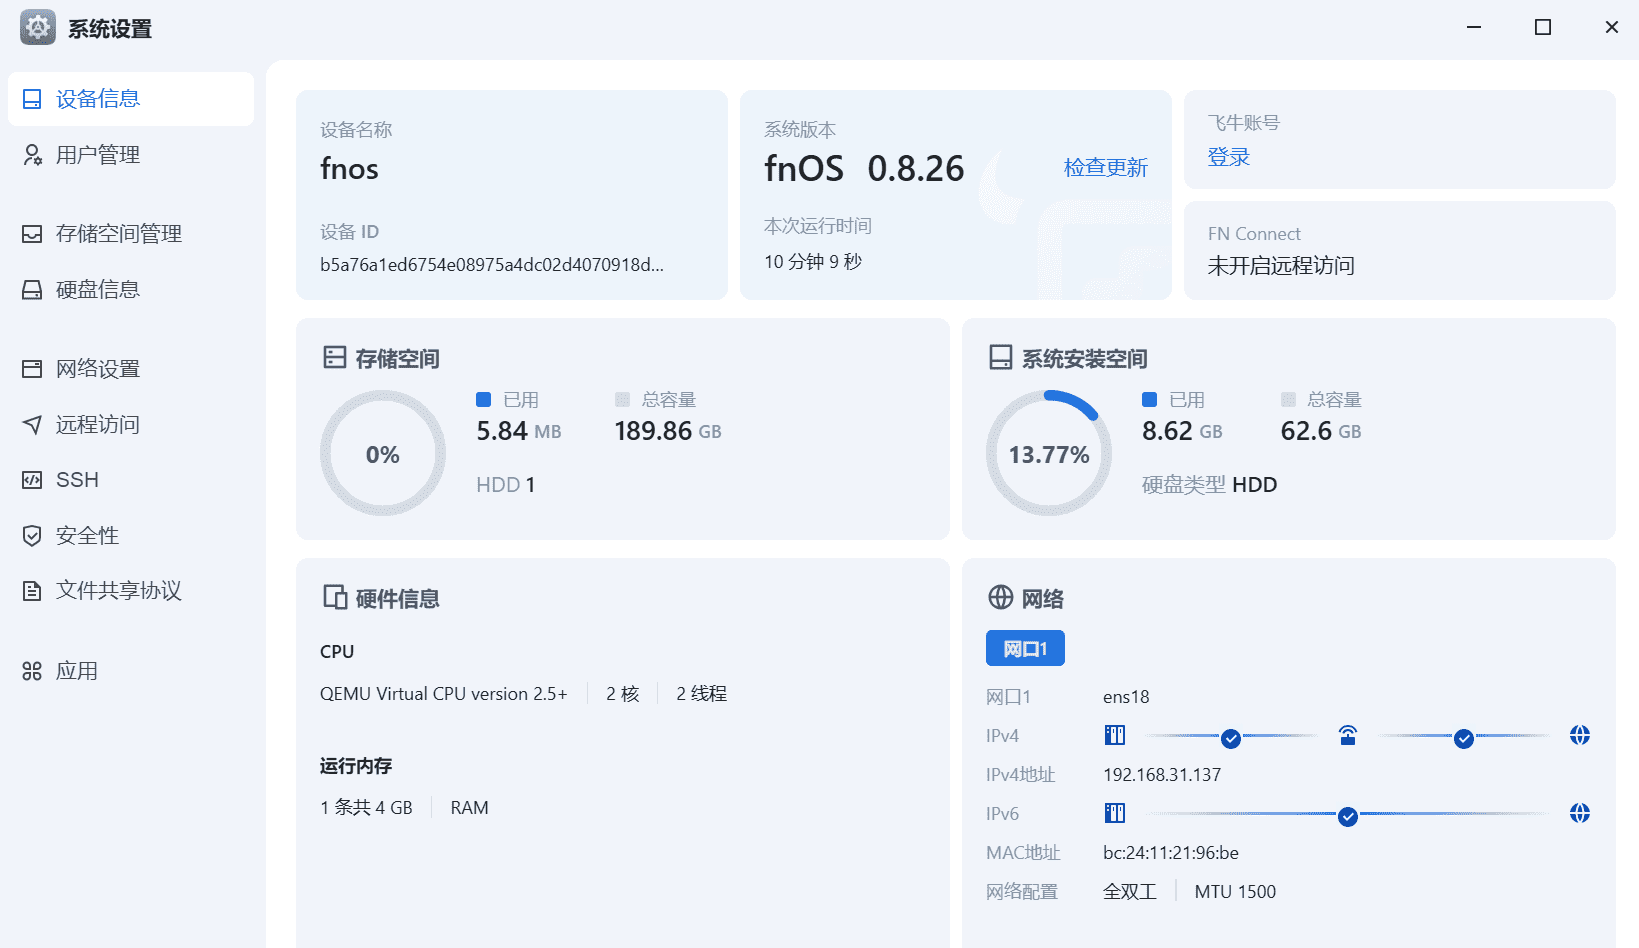
部署Fnos 考虑了一下我只是放一些自己的工具,代码之类的,群晖那么多高级功能我又不用,刚好最近发现了这一款系统,基于debian 12的,我准备使用它来构建个人云存储了:
看了下官方文档,创建虚拟机镜像和平常Linux没啥区别,磁盘我选择给了256GB固态,因为说该系统剩下的空间可以用来存储,我估摸着差不多,创建虚拟机打开:
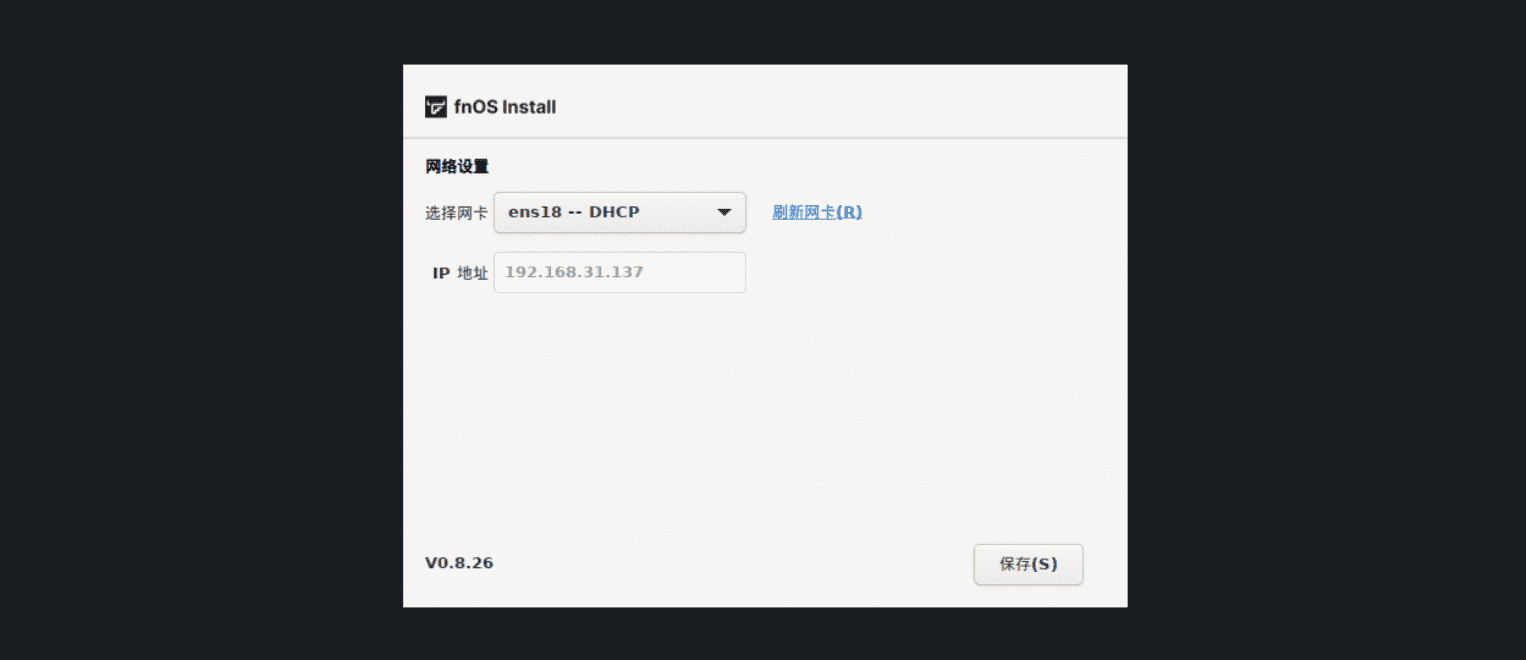
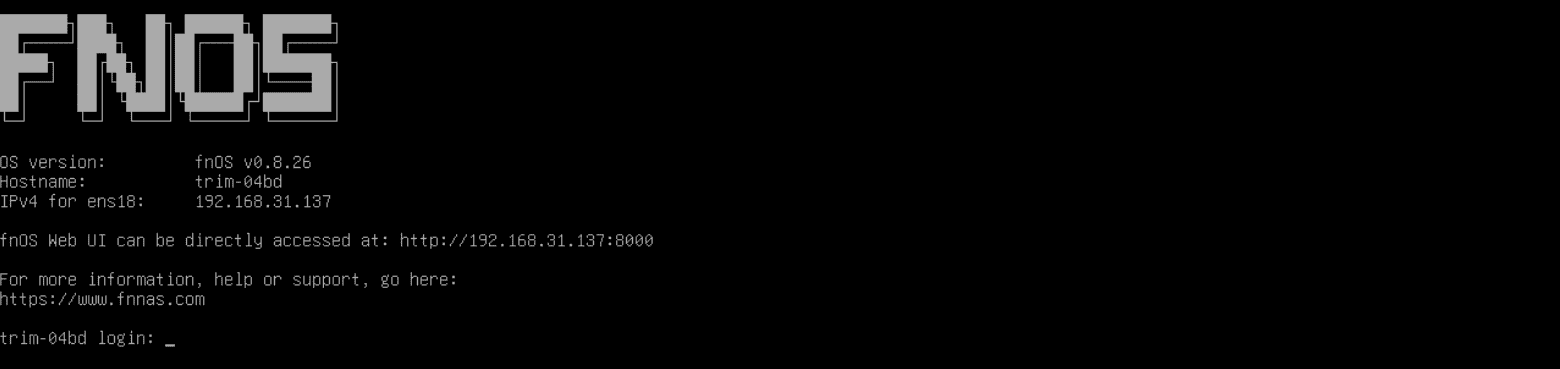
系统分区官方给了64GB,就先按64GB设置,不差这点空间。等待安装完成后会默认DHCP获取个IP地址:
点击保存会提示重启进入系统。这里与PVE一样会显示web管理URL
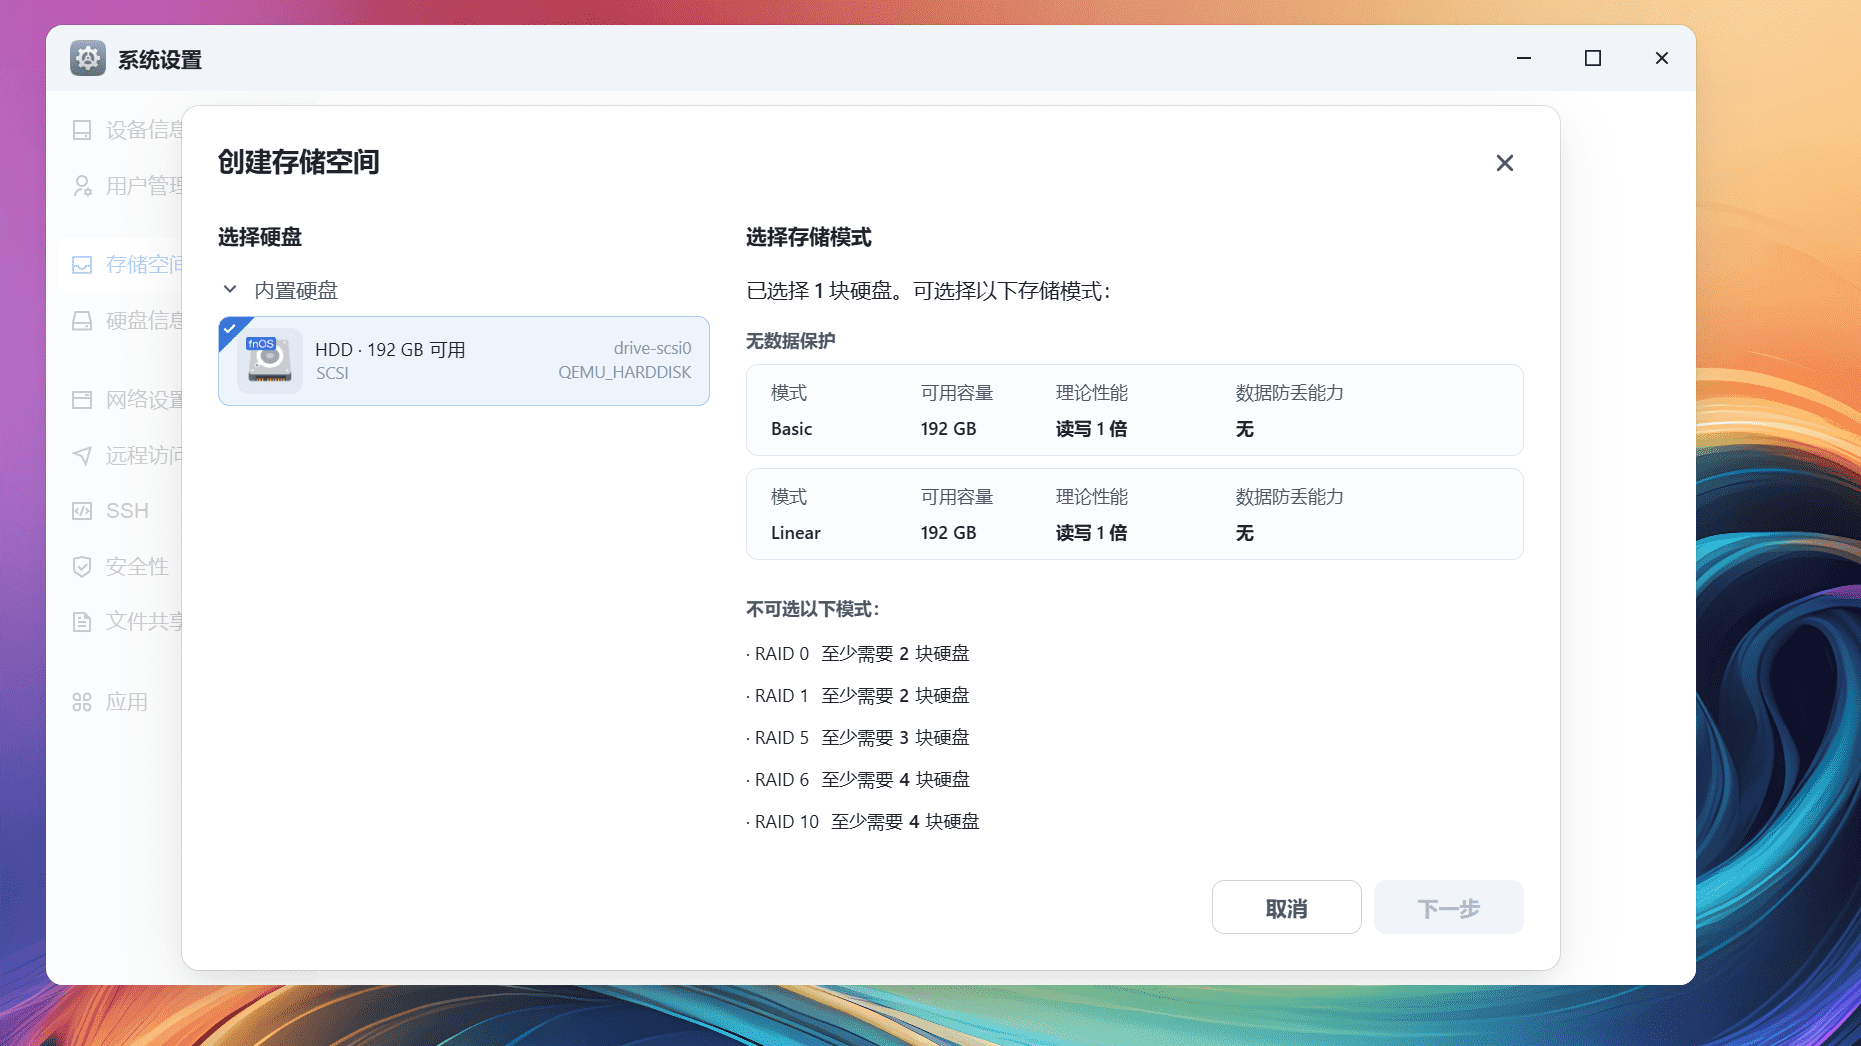
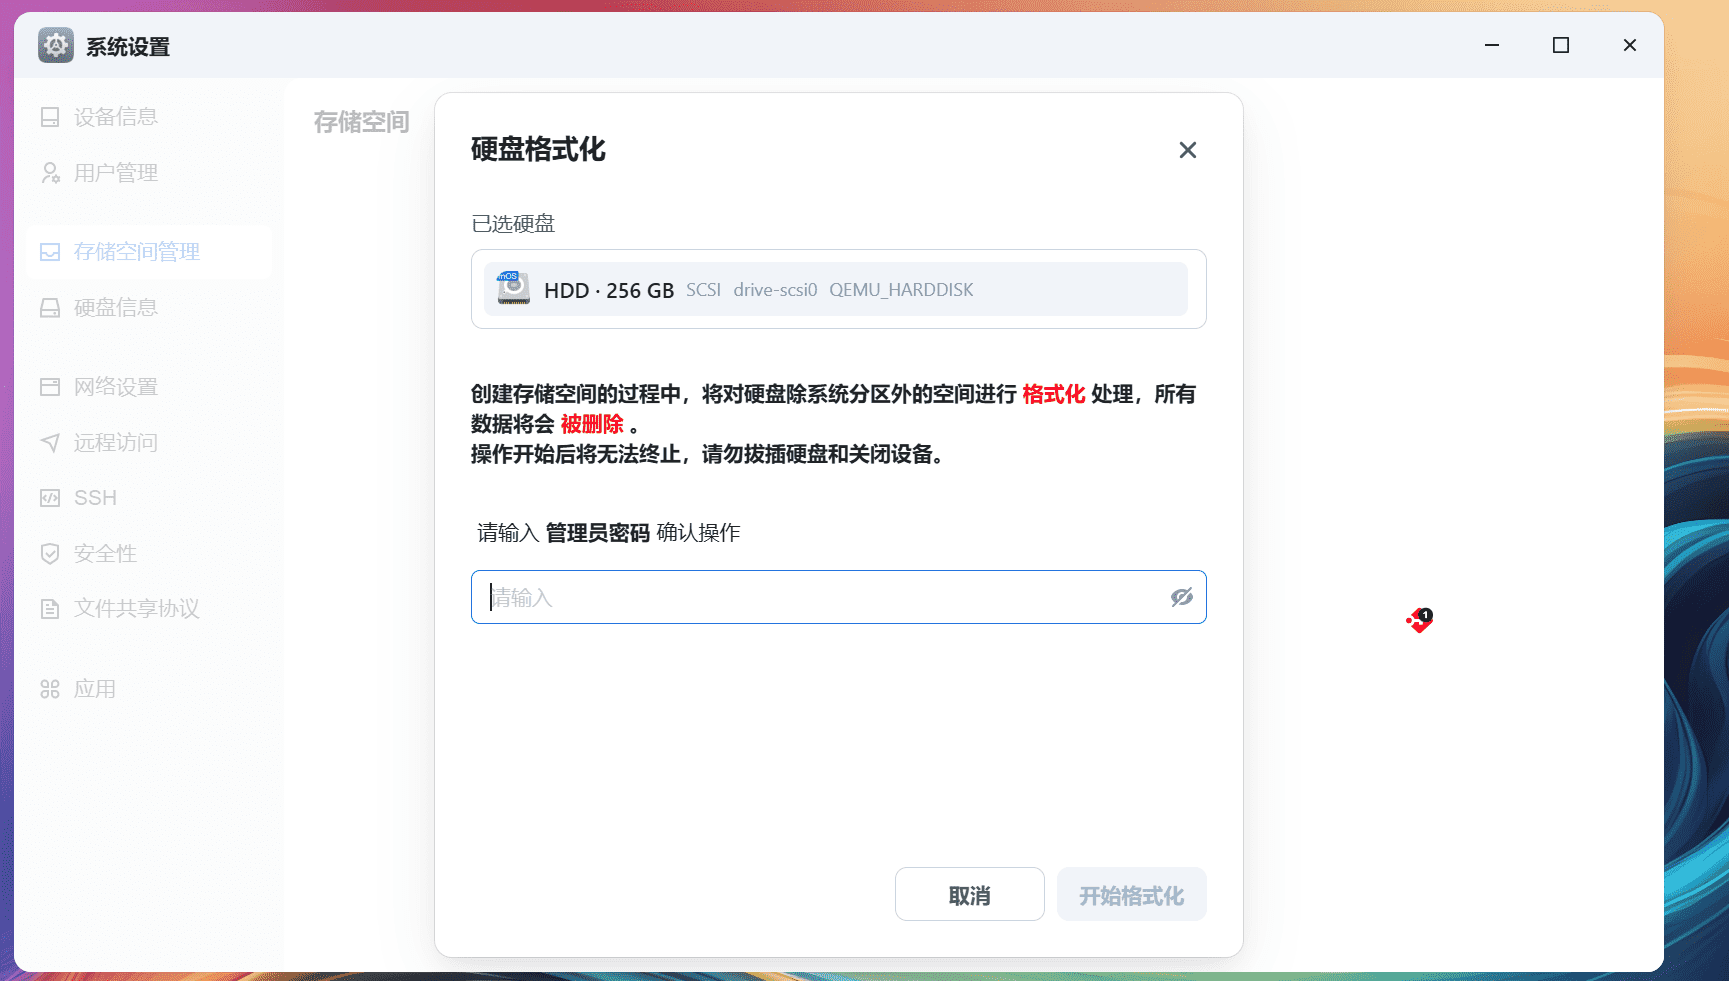
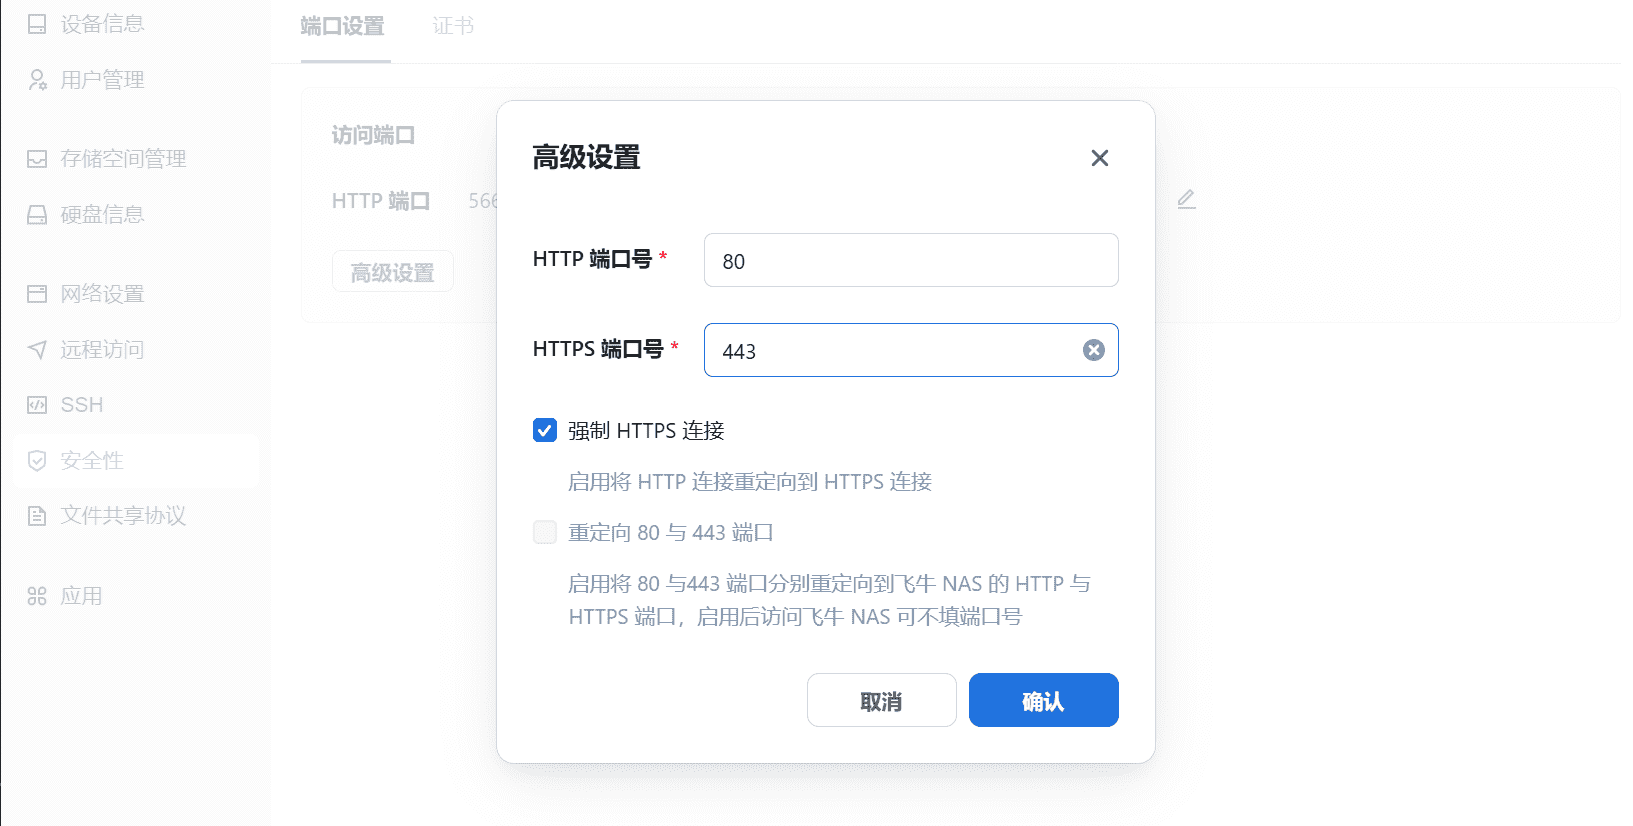
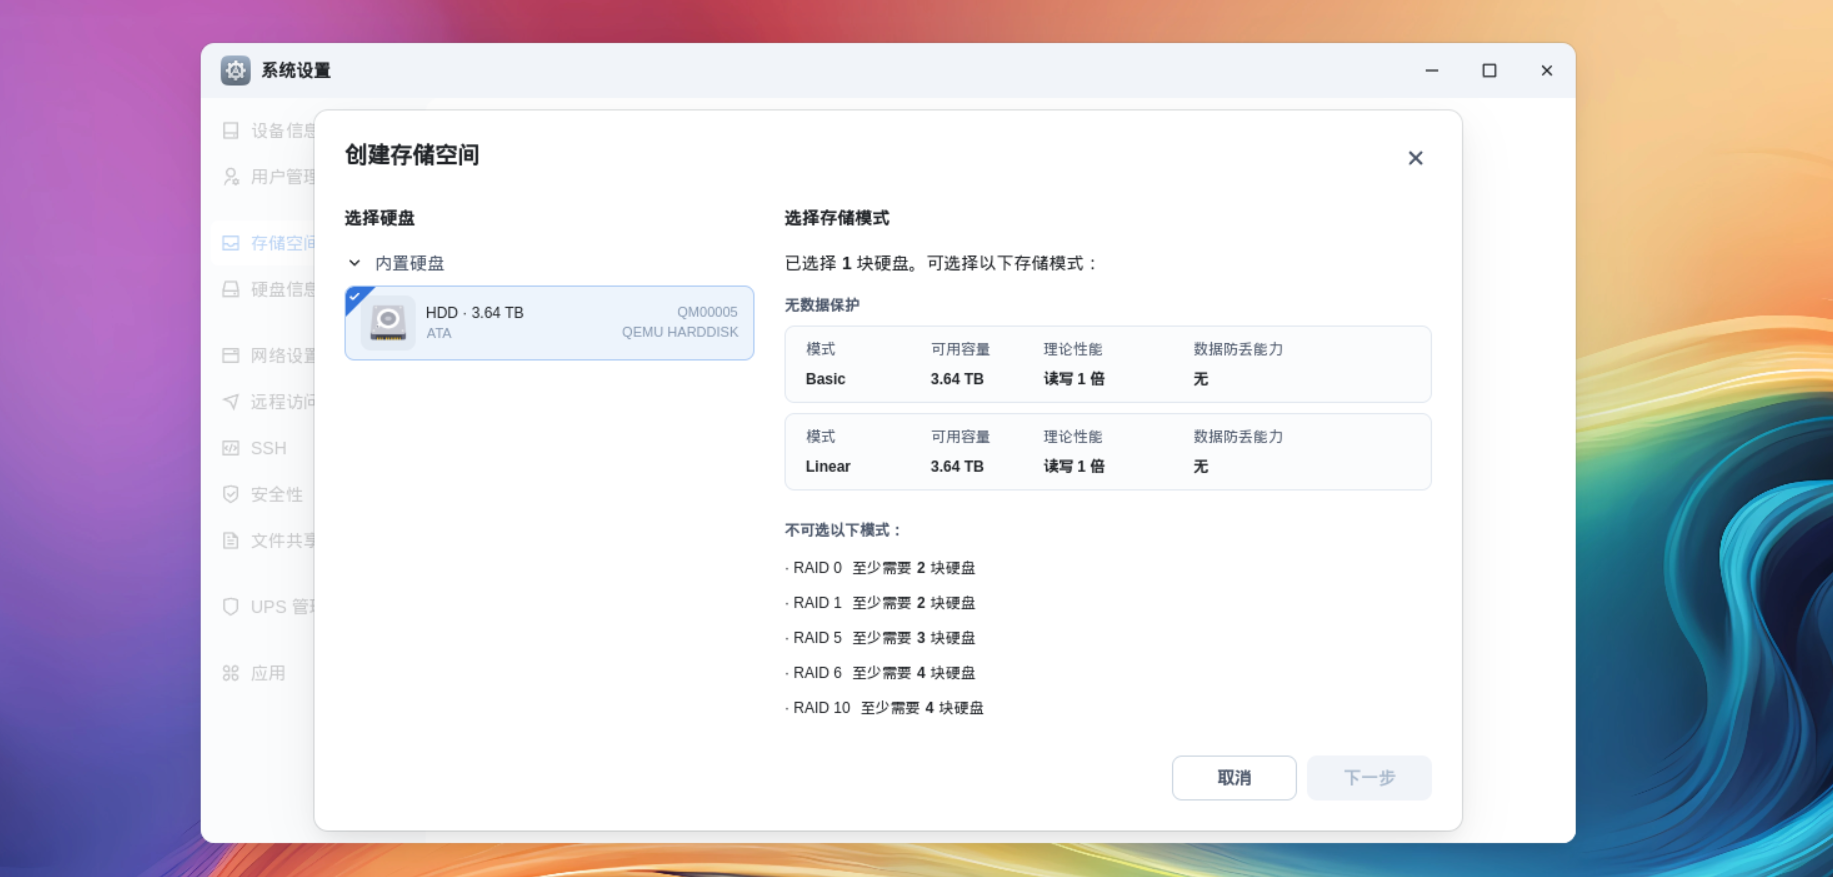
8000端口是http协议的,如果要https直接输入https会被跳转重定向到5667端口。然后初始化的设备命名,设置管理员账号密码等。登录进入后提示创建存储空间,这就是系统分区完剩下的固态硬盘:
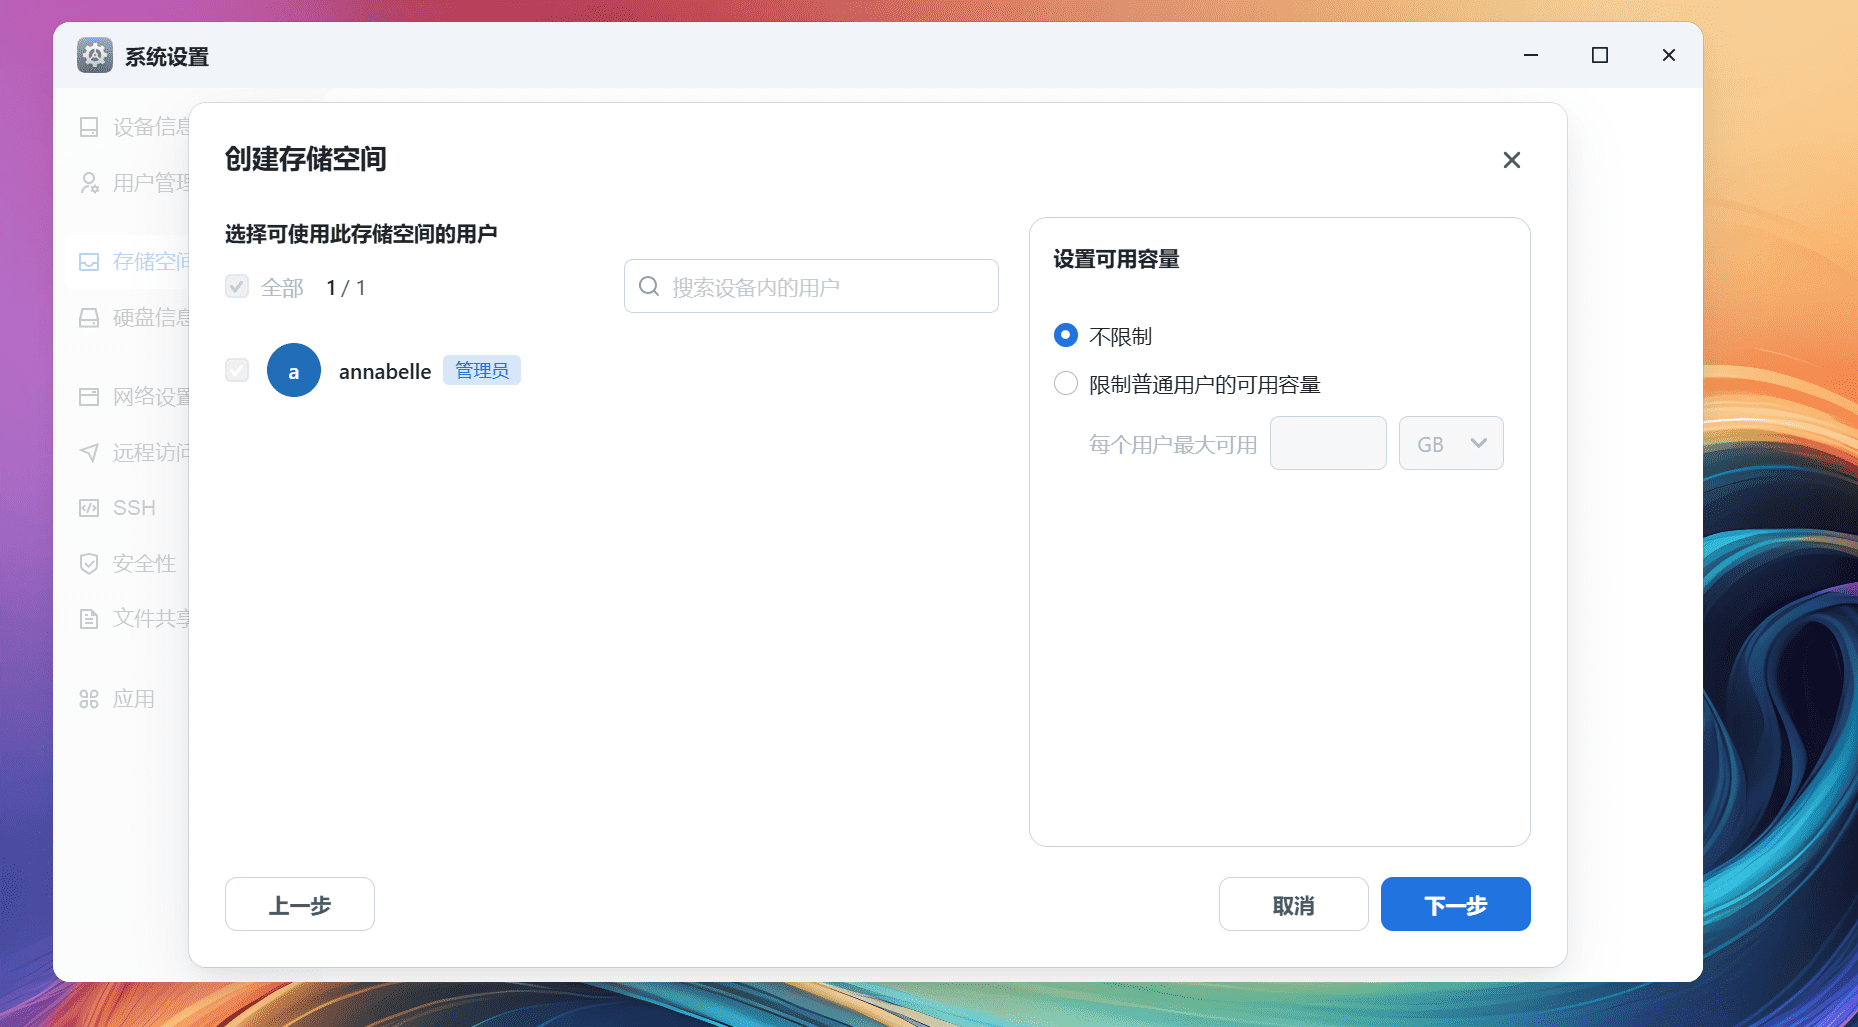
我是单固态硬盘,所以选Basic模式,自己用肯定空间不限制:
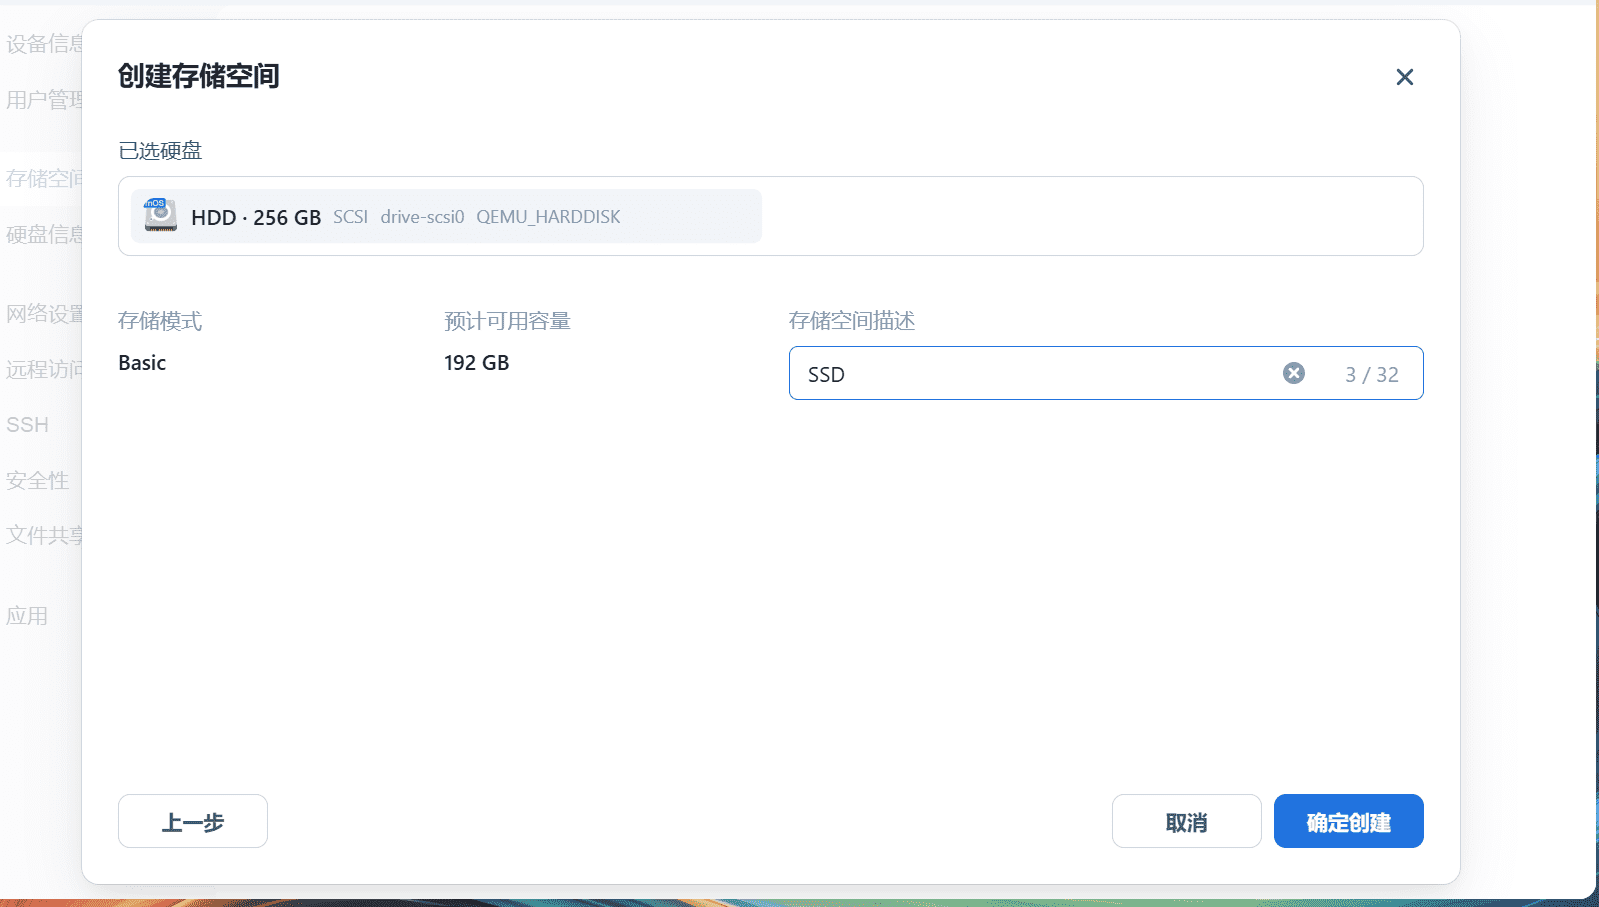
为存储分区添加个备注:
会要求二次认证:
这个UI挺符合我的审美:
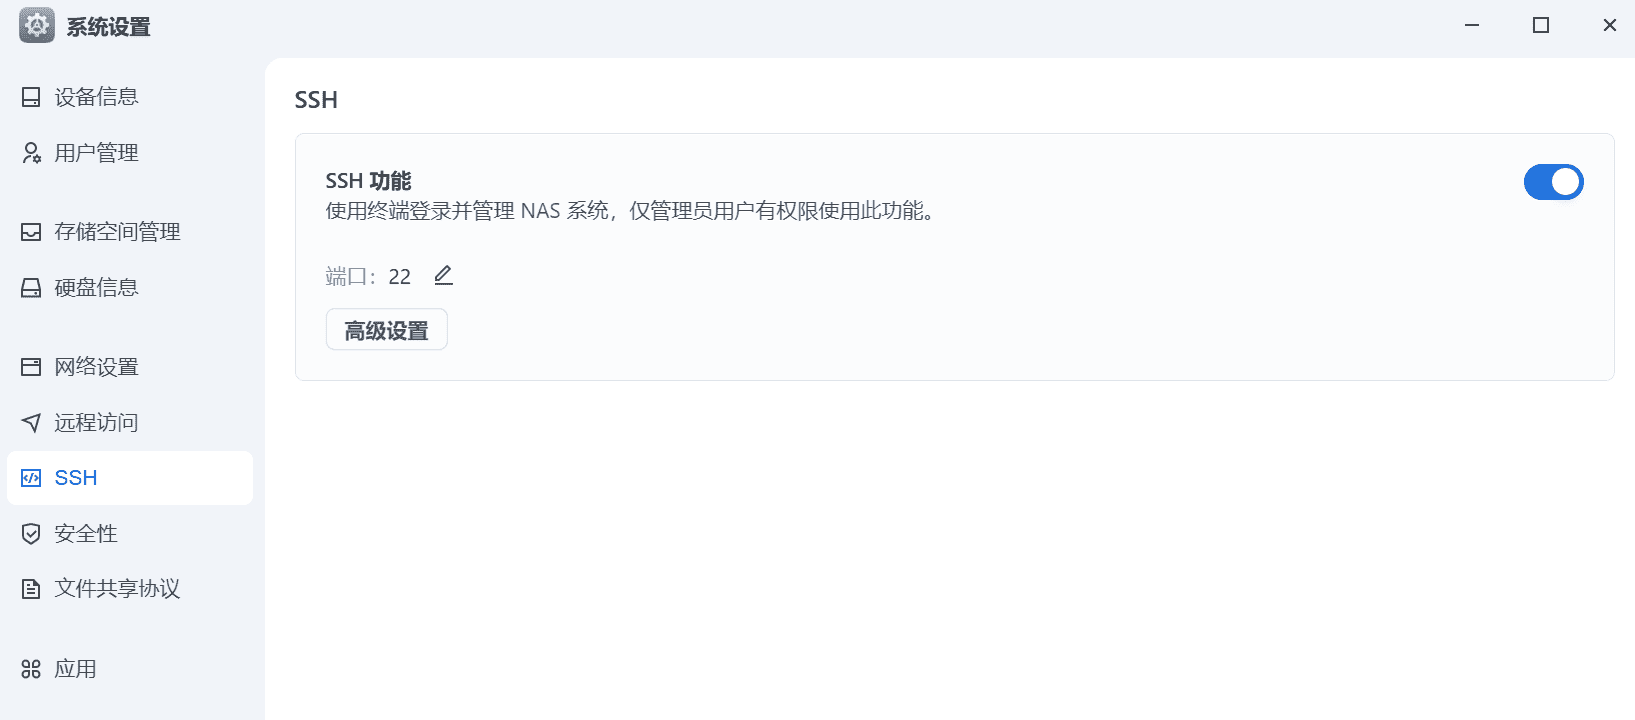
优化 飞牛OS有自己的APP,借助NAS自己的挂载和APP可以实现多端文件同步,终于可以告别多个设备来回传输文件的痛苦了。首先需要将SSH服务给开启:
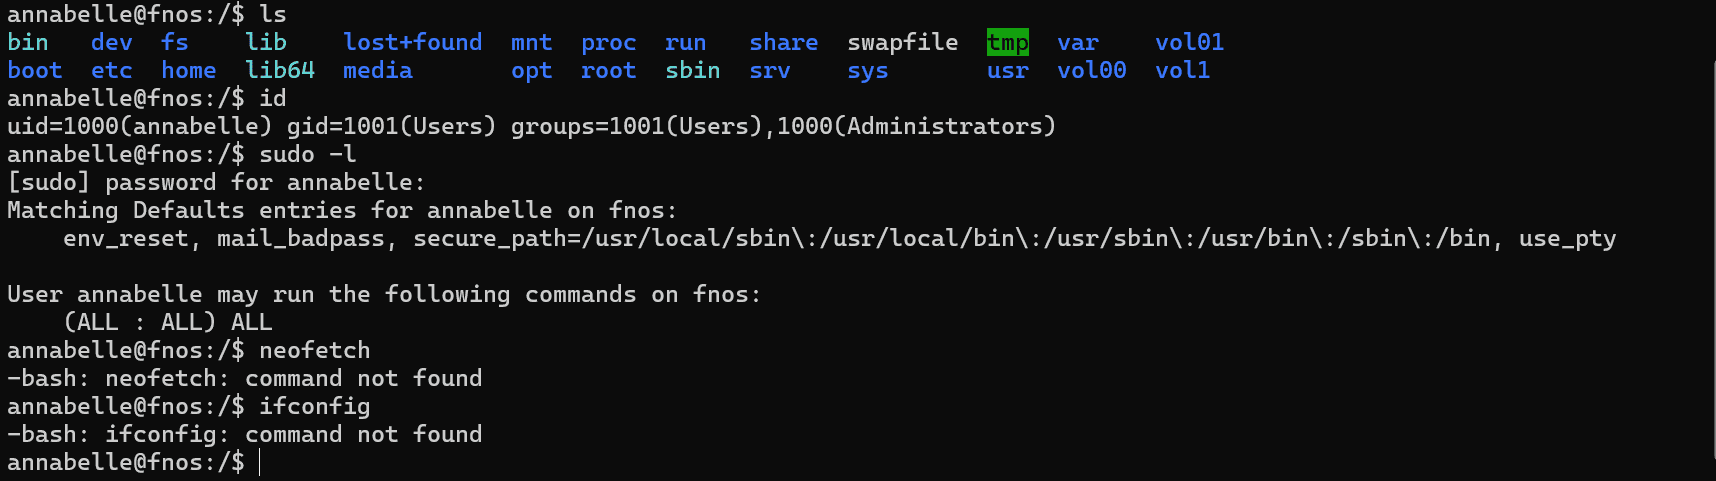
然后就可以ssh进行登录:
直接敲命令:
1 curl -fsSL https://tailscale.com/install.sh | sh
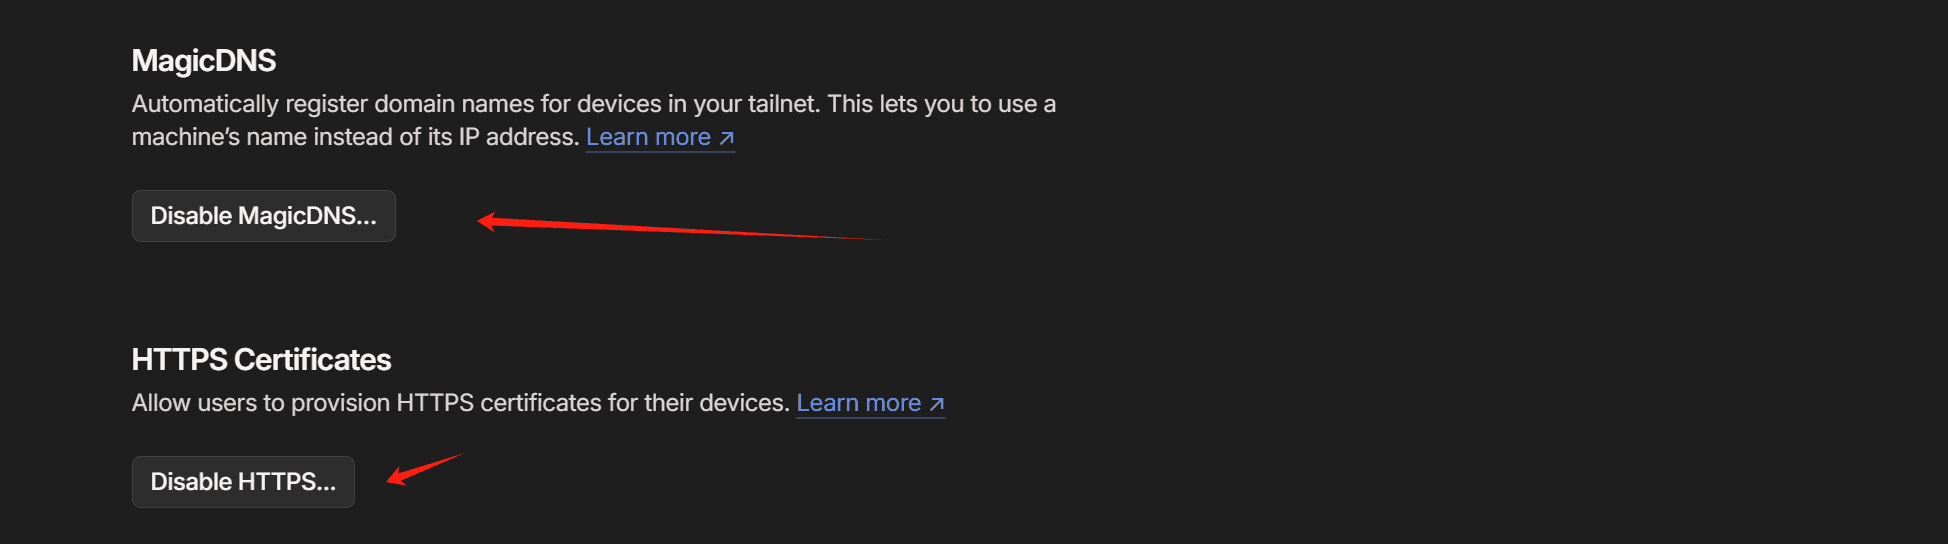
每次肯定不能直接填写IP地址进行访问实在不优雅,而且HTTPS证书不可信会触发浏览器警告。这里选择使用tailscale为机器添加白名单证书,需要在Tailscale面板中开启:
然后在终端中敲以下命令:
1 2 sudo tailscale cert tailscale.domain.name
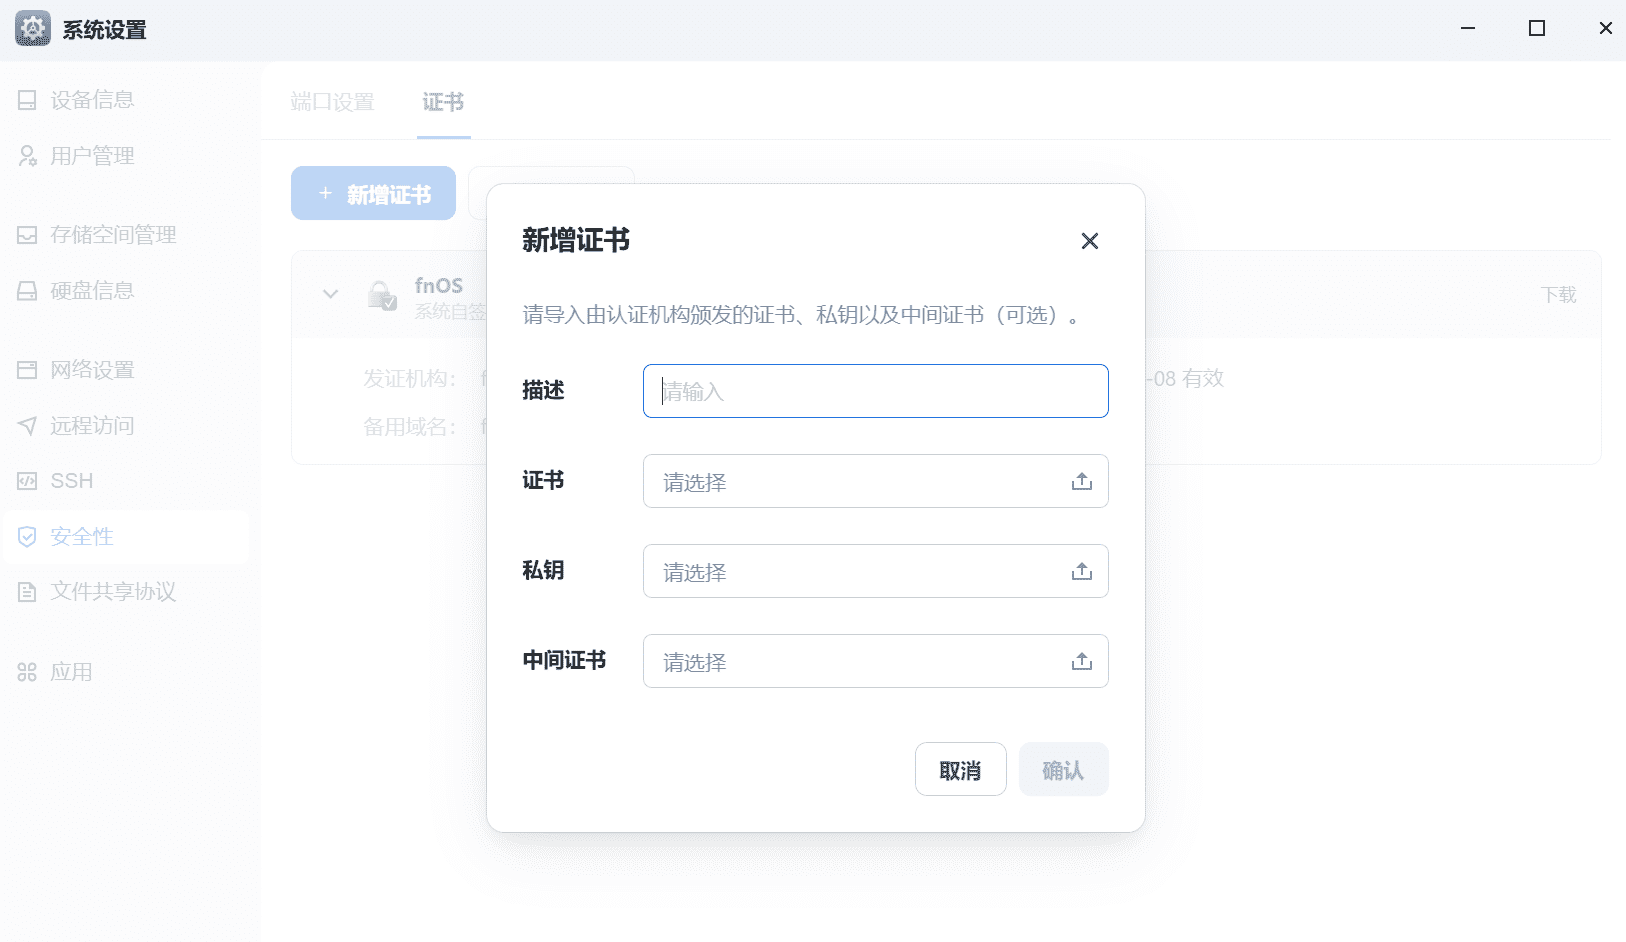
拿到证书后在Fnos系统设置里上传证书:
将端口也改掉:
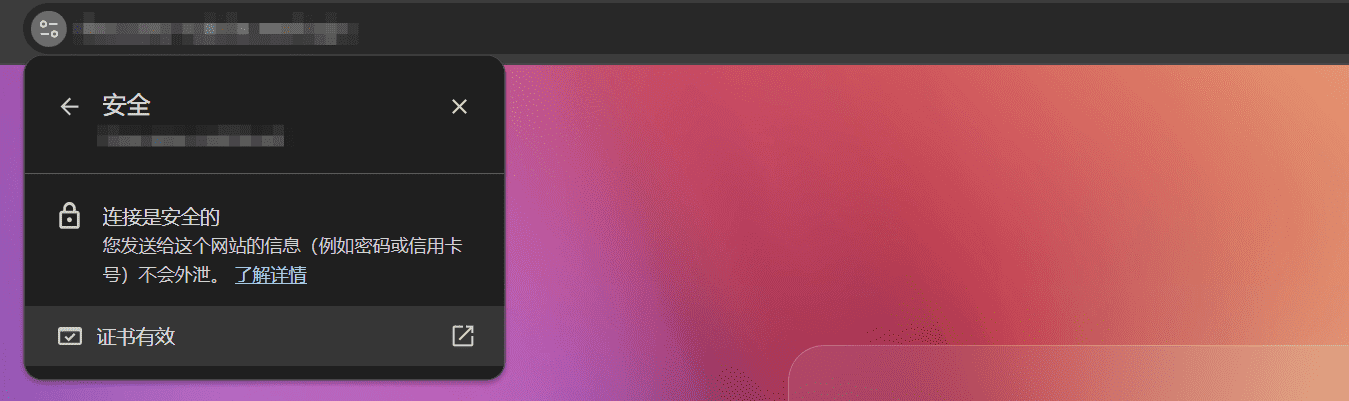
配置成功,优雅:
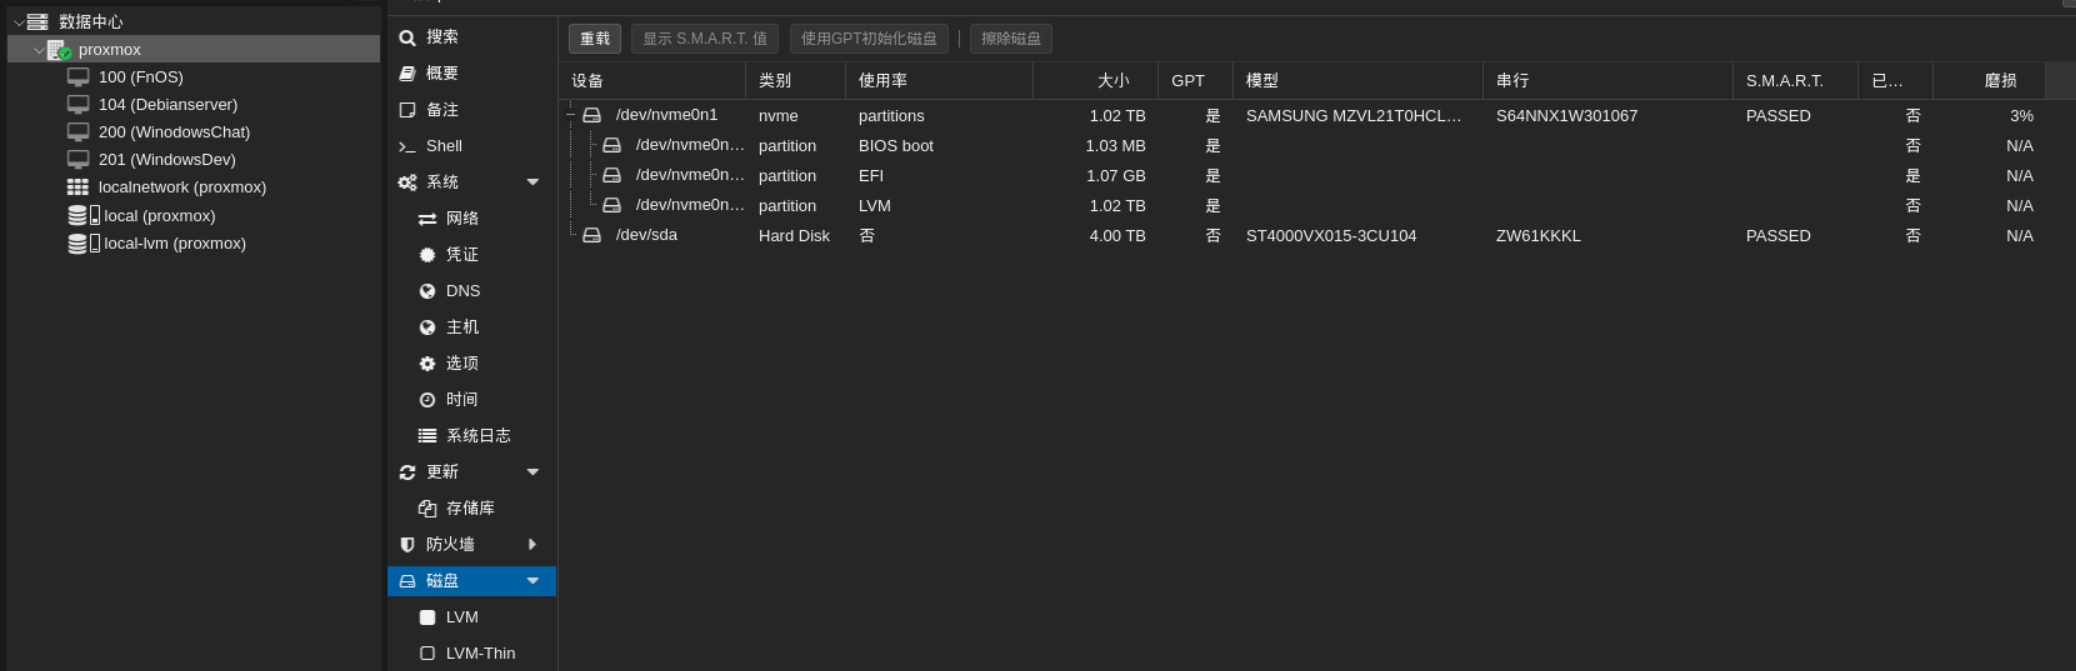
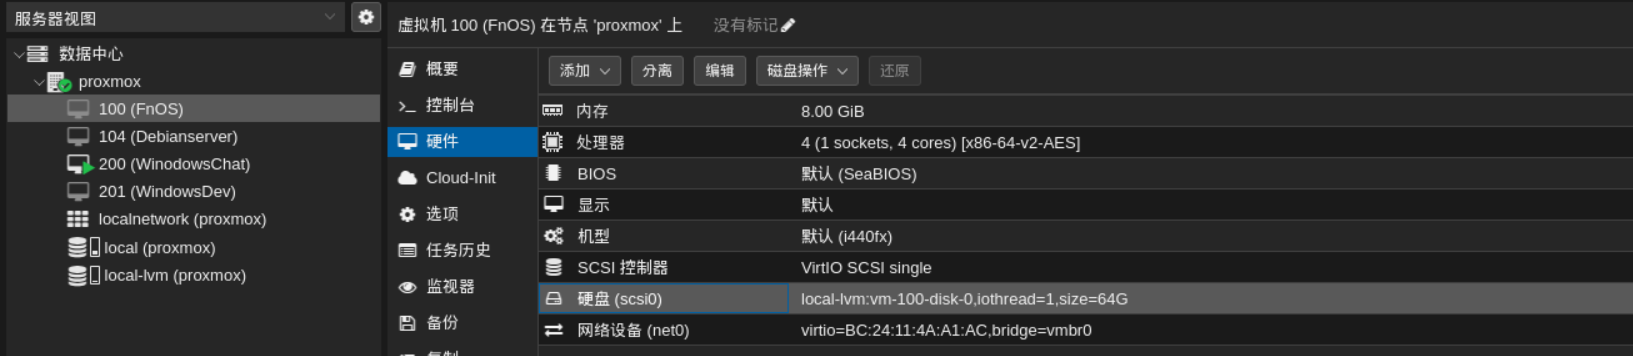
硬盘直通 如下图所示,找到对应磁盘的信息:
虚拟机的ID,以我的NAS为例,ID为100,机械硬盘的串行为ZW61KKKL,输入以下命令去查看自己的硬盘:
第一块就是我的机械硬盘。将自己的硬盘ID完整复制:
1 ata-ST4000VX015-3CU104_ZW61KKKL
还有个硬盘设备号:
硬盘设备号需要在NAS硬件信息中没有的编号:
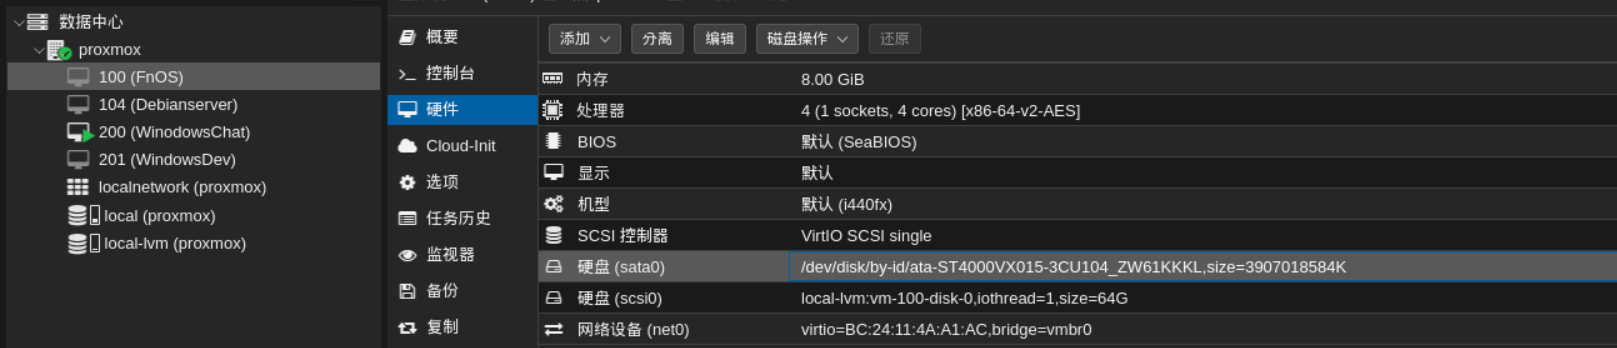
然后使用如下命令:
1 qm set <虚拟机ID> --<硬盘设备号> /dev/disk/by-id/<硬盘ID>
示例:
1 qm set 100 --sata0 /dev/disk/by-id/ata-ST4000VX015-3CU104_ZW61KKKL
再看飞牛硬件信息,可以看到多了一个sata0硬盘:
然后启动飞牛NAS,进入点击创建存储空间,即可看到机械硬盘:
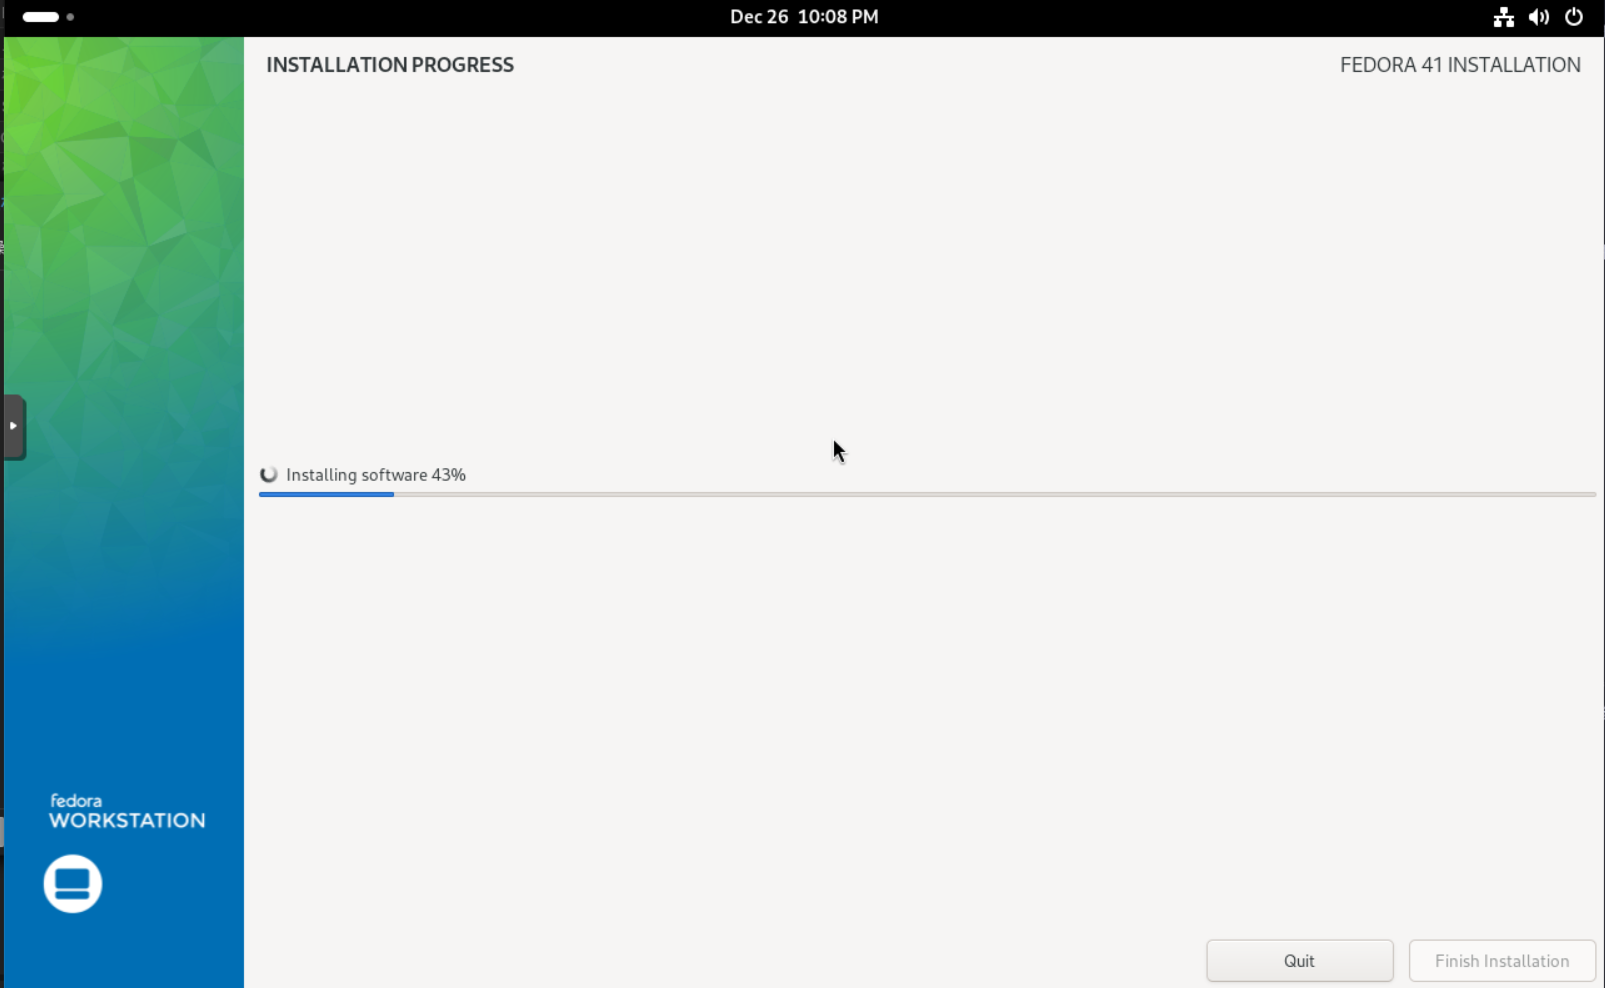
部署Fedora 选择使用Fedora-Workstation版本,我给了他8H32GB的配置。虚拟机创建与linux一样,具体安装是会先进入到一个live系统,然后有各图形化安装界面,而且极其简单,选择语言、键盘映射、自动分区,下一步即可一键自动安装:
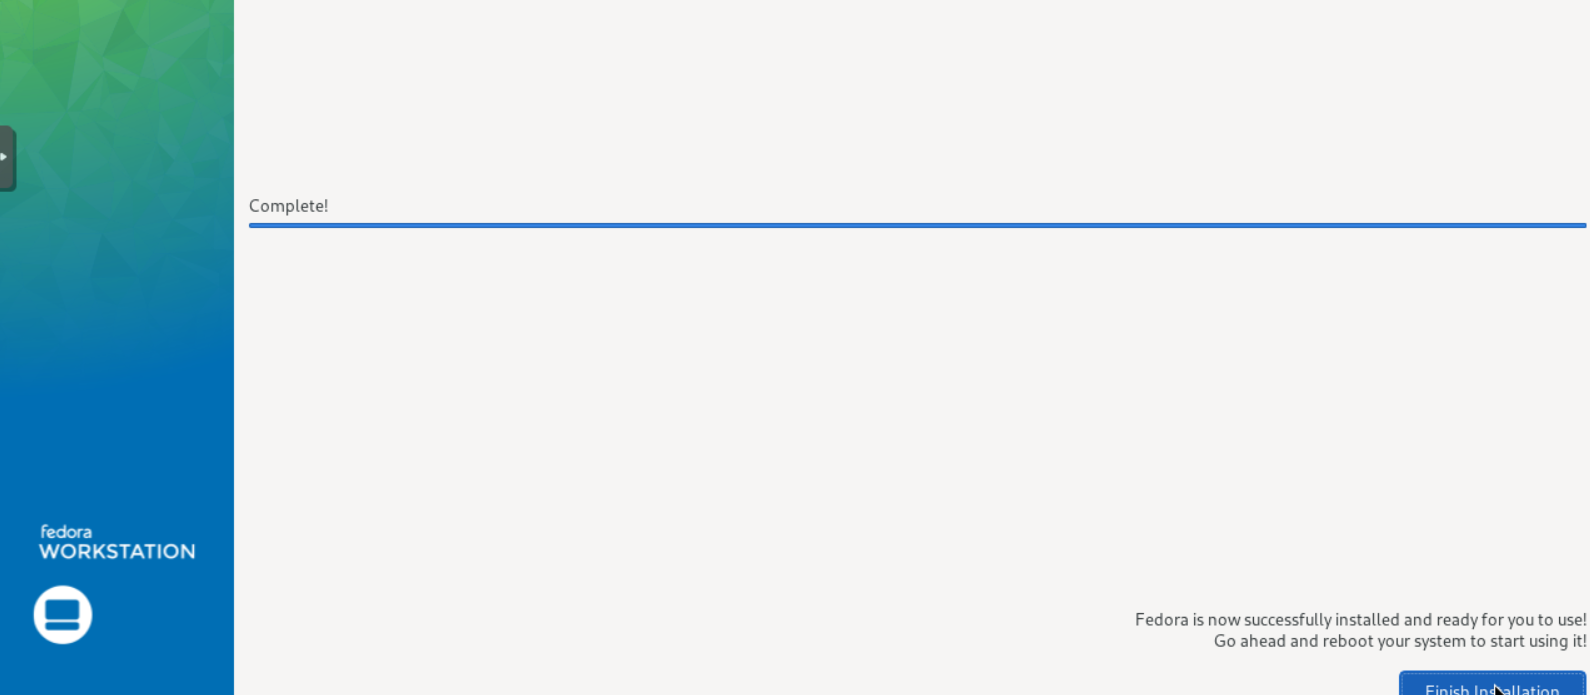
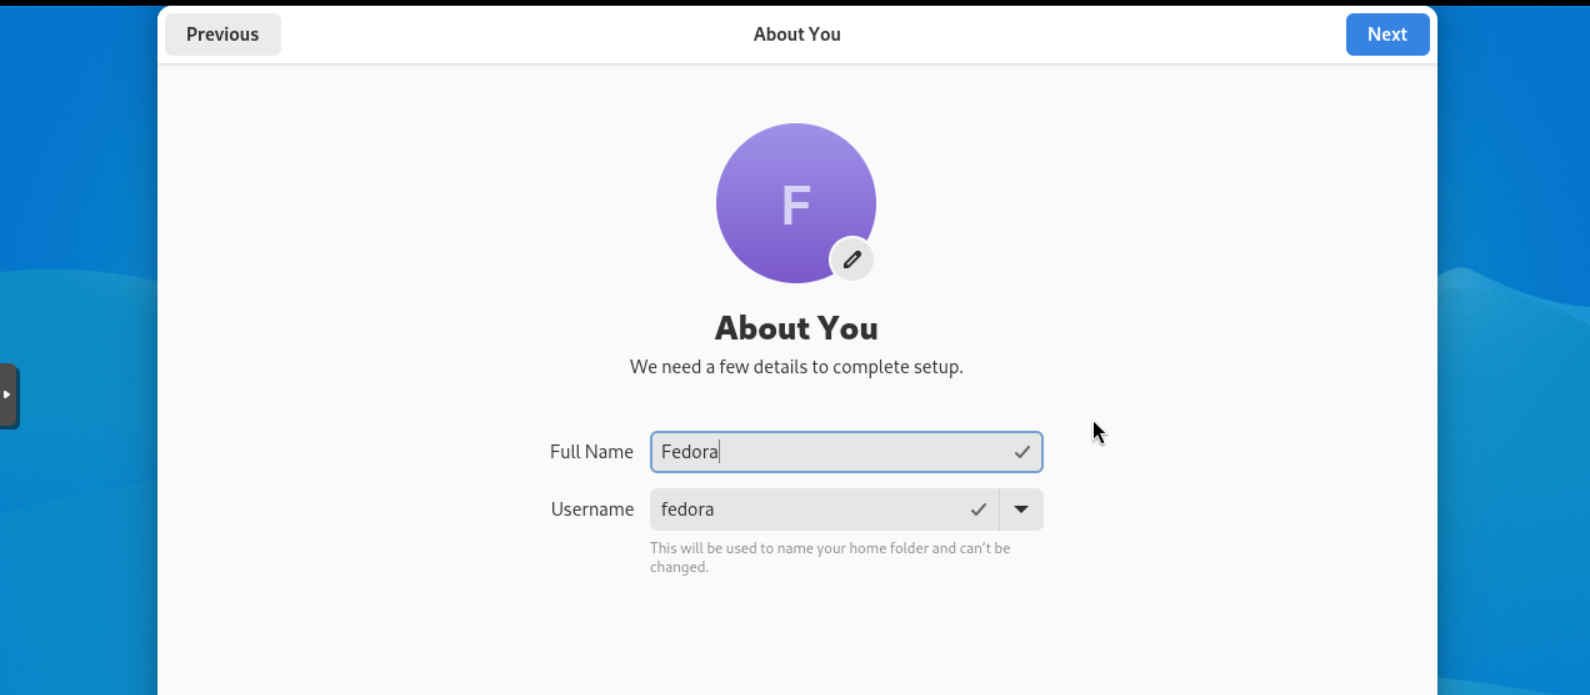
等待安装完毕后点击结束安装即可:
然后重启即可,用户信息那些是在等安装完重启后进入新系统,才出配置的:
有个比较坑的点,Fedora安装完主机名会自动更改为localhost-live,为了方便运维管理,我将其更改为了Fedora:
1 sudo hostnamectl set-hostname fedora
/etc/hosts中也需要加一条,不然容易报错:
开启SSH服务:
1 sudo systemctl enable sshd.service
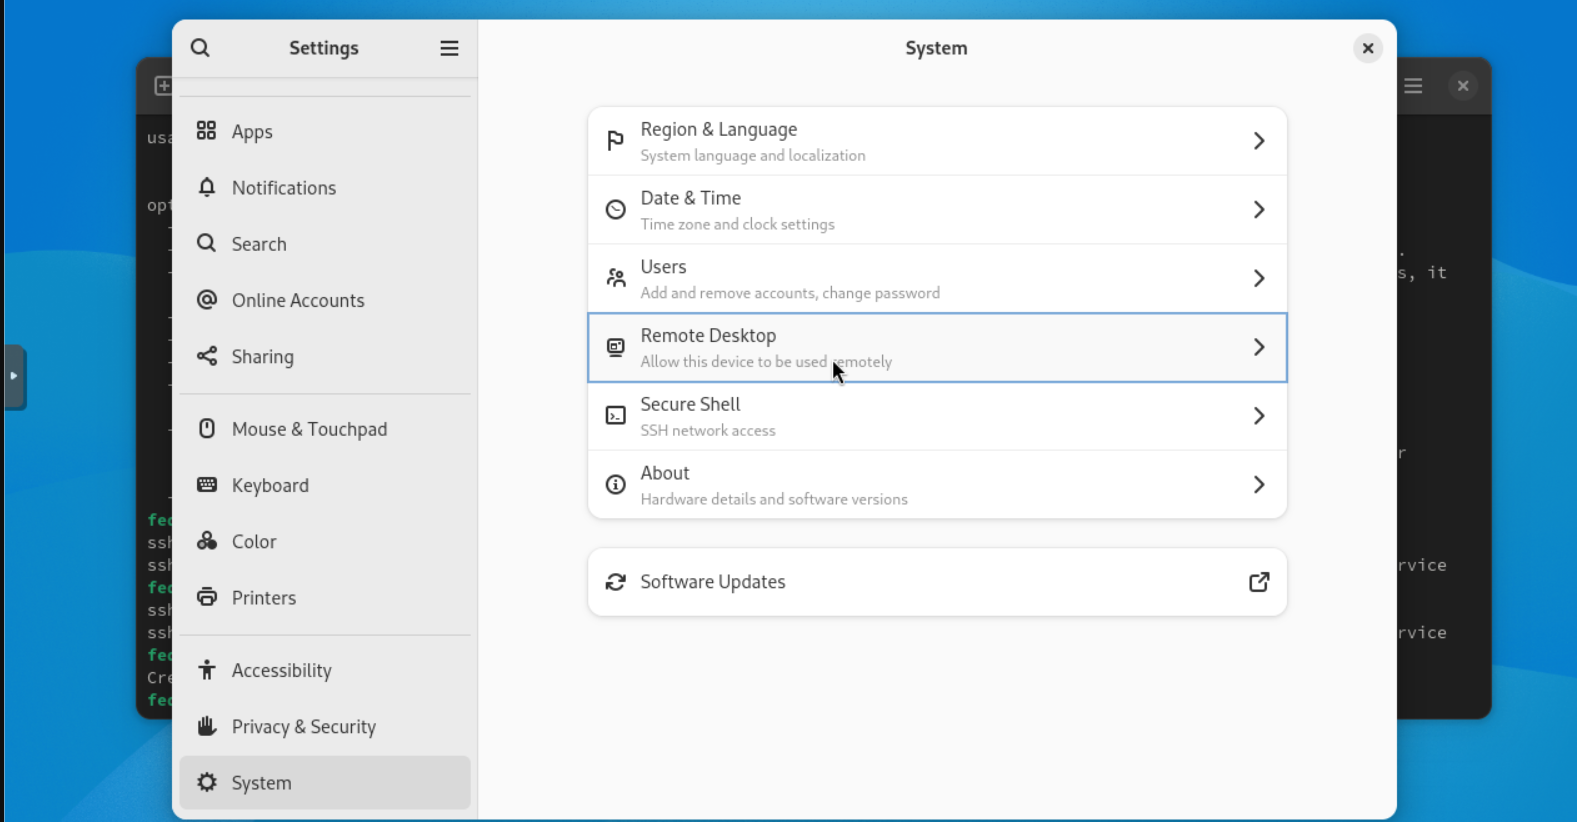
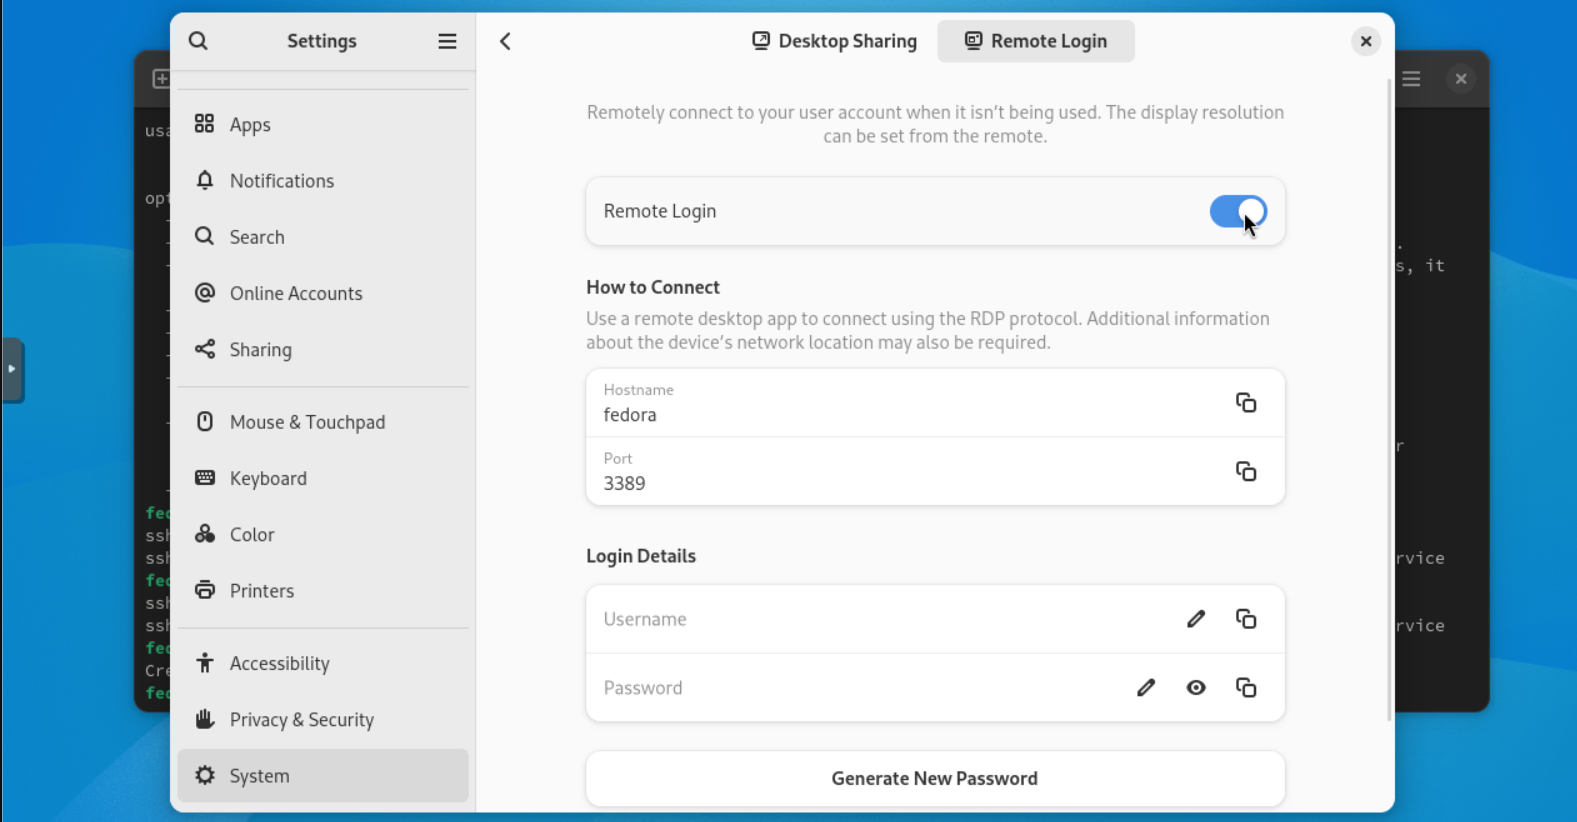
开启RDP服务:
Fedora默认开启了防火墙,需要放行22、80、443、3389常用端口:
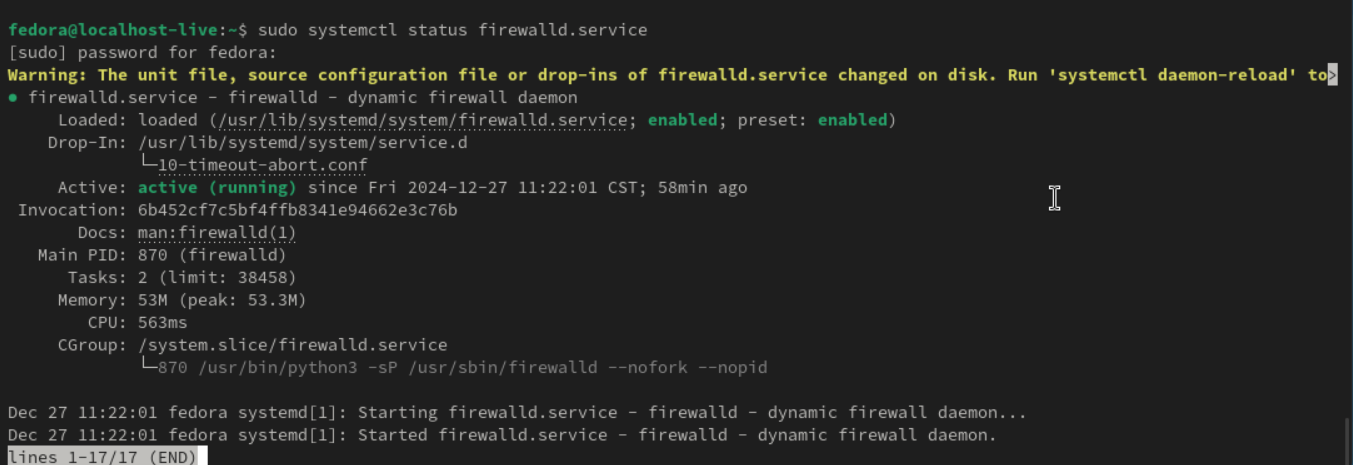
1 2 3 4 5 6 7 8 9 10 11 sudo firewall-cmd --permanent --add-port=22/tcp sudo firewall-cmd --permanent --add-port=80/tcp sudo firewall-cmd --permanent --add-port=443/tcp sudo firewall-cmd --permanent --add-port=3389/tcp
重新加载防火墙规则:
1 sudo firewall-cmd --reload
将其添加进Tailscale中:
1 curl -fsSL https://tailscale.com/install.sh | sh
AWVS那些环境,我都准备使用docker运行的,所以需要一个nginx做转发解析:
安装docker:
1
2
sudo dnf -y install dnf-plugins-coresudo dnf-3 config-manager --add-repo https://download.docker.com/linux/fedora/docker-ce.repo
1 sudo dnf install docker-ce docker-ce-cli containerd.io docker-buildx-plugin docker-compose-plugin
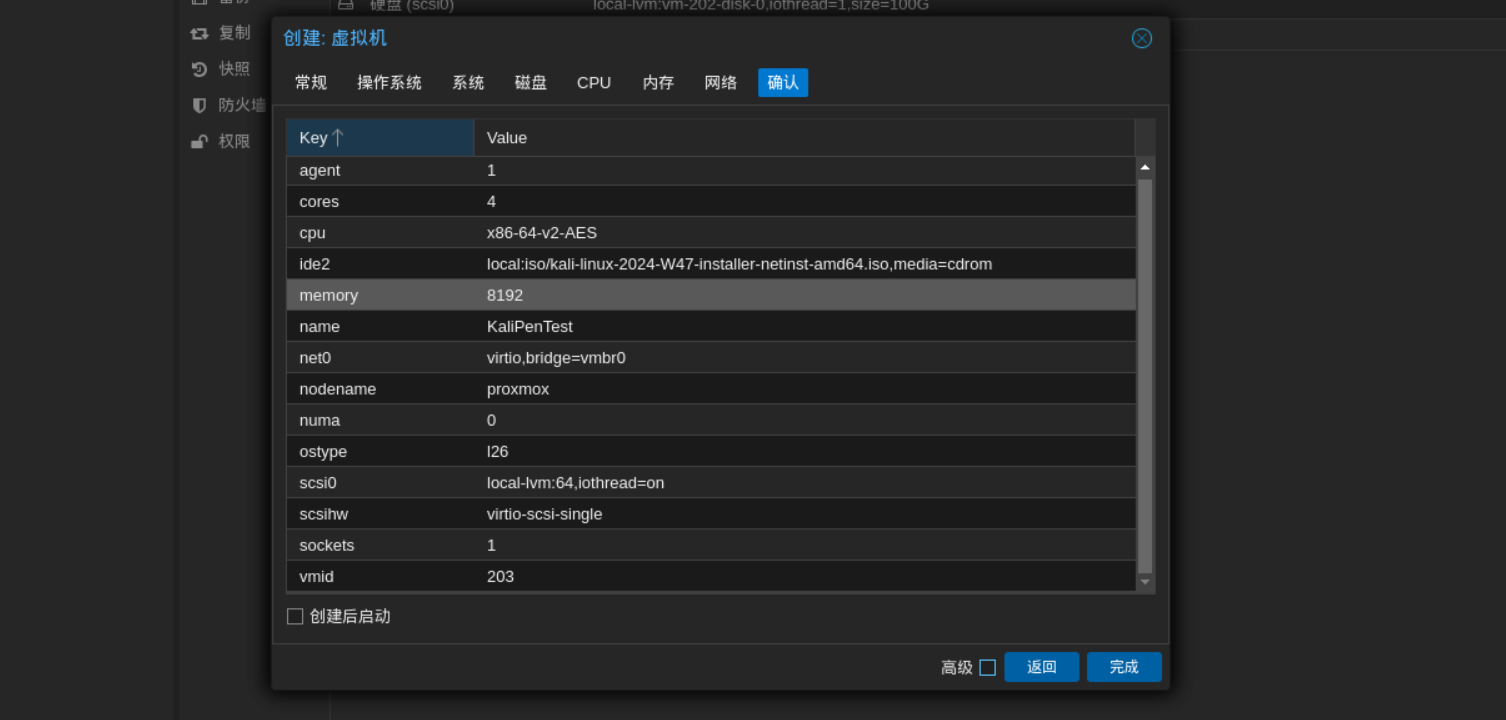
部署Kali
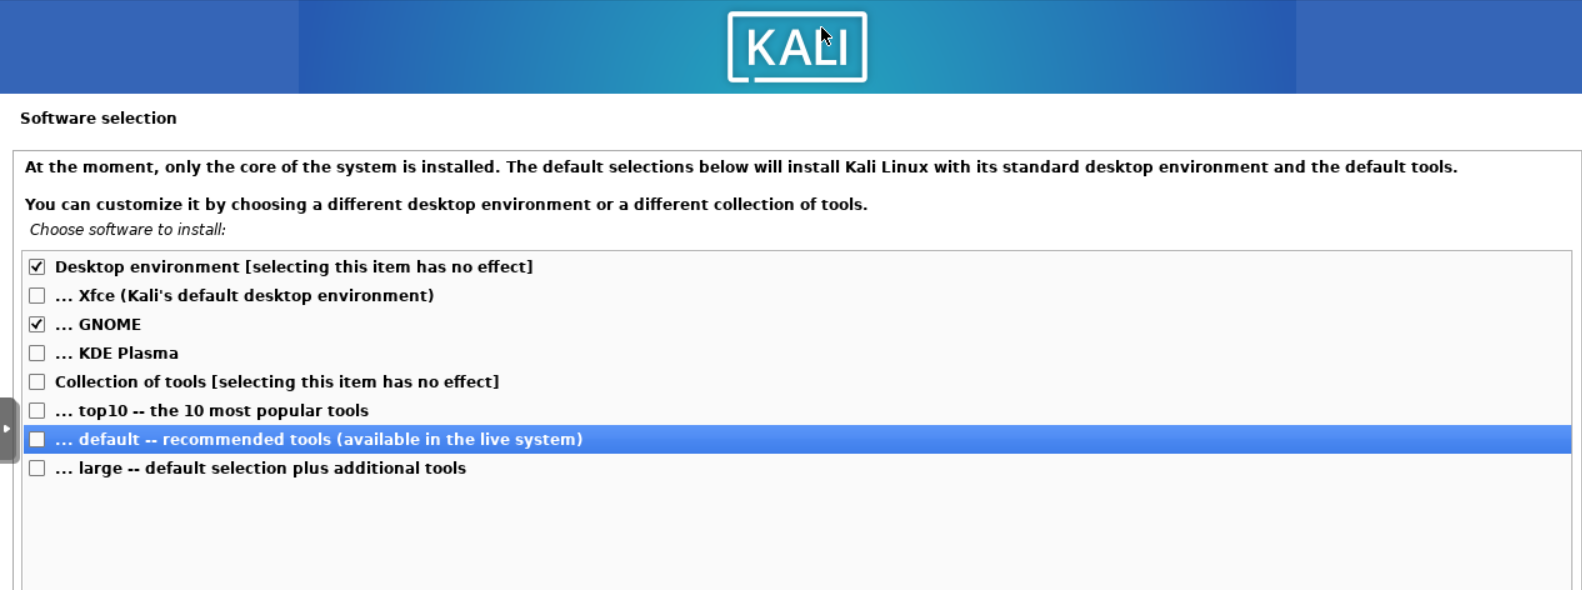
kali如果遇到网络问题,在启动引导镜像安装时,到填写HTTP代理时候,可以故意随便填写写skajdlajdla乱字母,让其报错,这样就可以自己手动输入国内源,速度就会快起来,选择纯净安装,只勾选自己想要的桌面环境:
安装好以后也是开启他的SSH,RDP服务,(kali的RDP目前有个问题,在设置界面会卡很久很久)开启方法与Fedora一样的。将其添加进tailscale中:
1 curl -fsSL https://tailscale.com/install.sh | sh
目前,基础设施就已经弄完了。
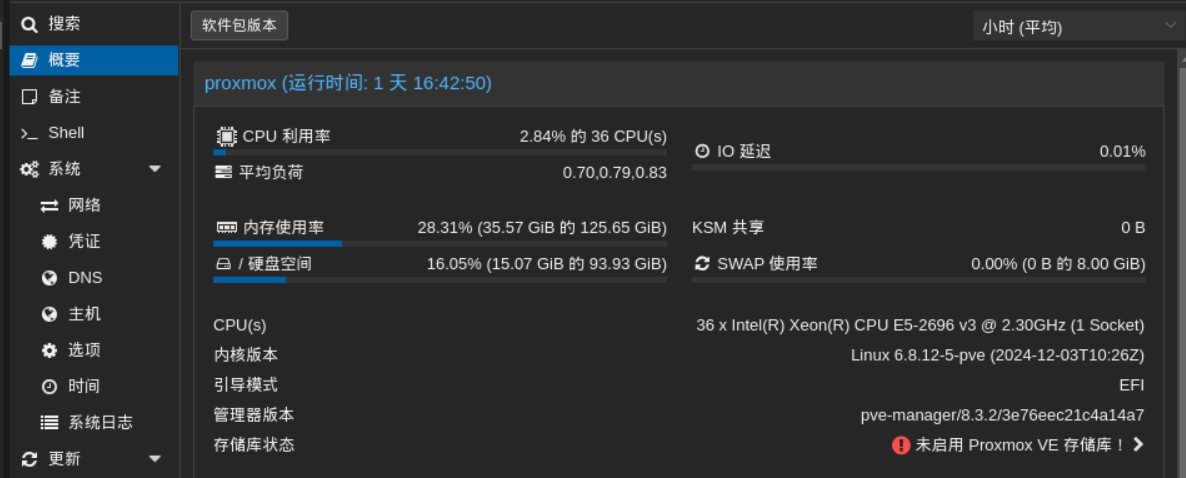
PVE的资源看起来也是动态分配的,6台全开,资源占用目前也只有这样。


 wechat
 alipay